

Summary: This article will guide how to use Bitwar Data Recovery Software Properly.
If you have checked How to install Bitwar Data Recovery Software, you can move forward to check Bitwar Data Recovery Software for Windows User Manual to find more on how to use Bitwar Data Recovery Software.
Table of Contents
How to Use Bitwar Data Recovery Software
Double-click the Bitwar icon from the Desktop. Choose Data Recovery for PC. You will view this window for only one time.
Bitwar Data Recovery requires a registered account, using License Code or purchasing the license directly from Bitwar will both need a registered account.
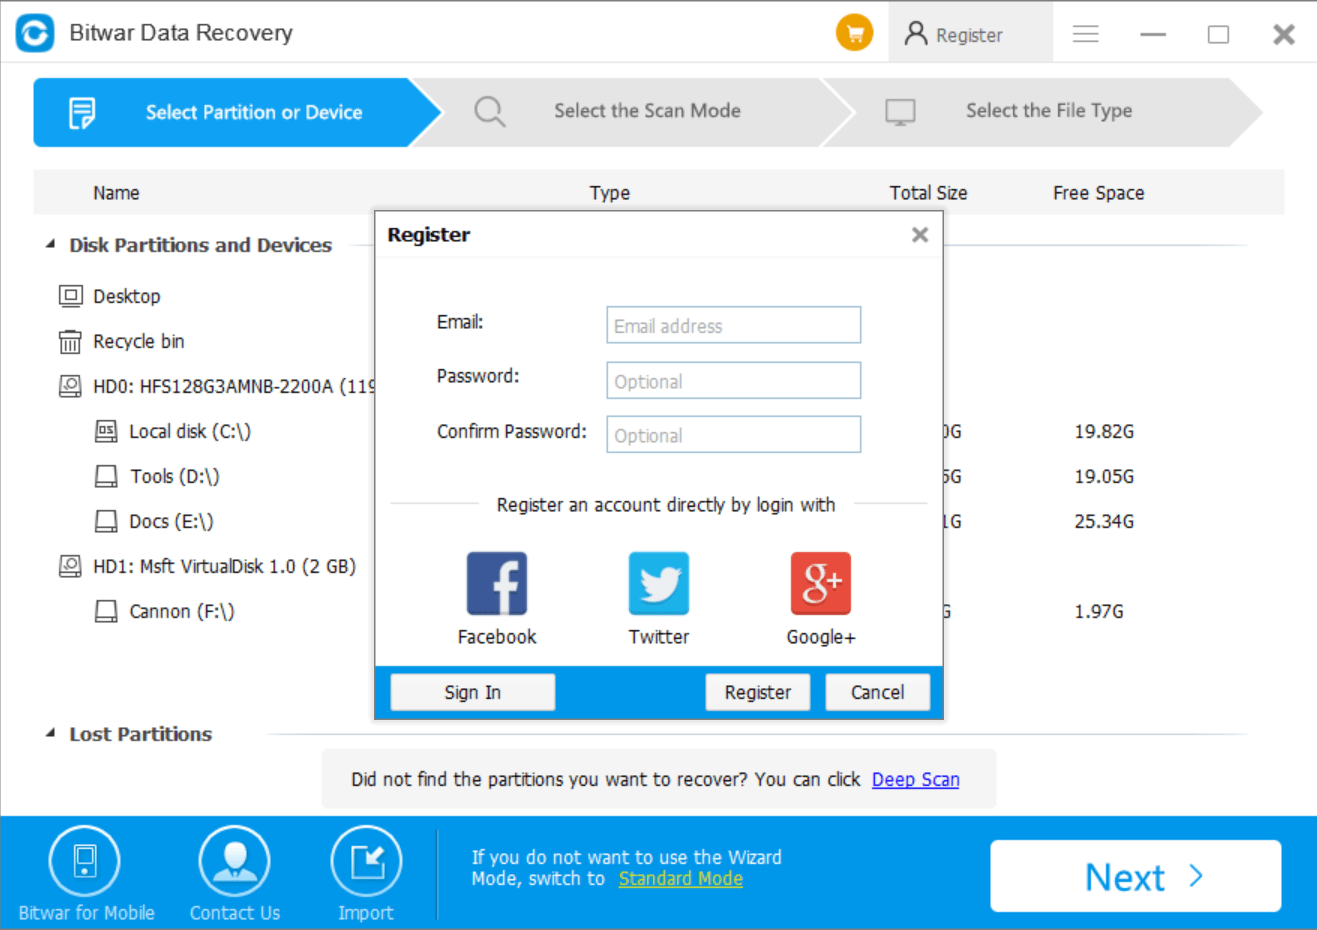
It shows tooltips balloon for the first run of the Bitwar Data Recovery Software, which can precisely point the exact function of the featured button.
Step 1 Software Interface Instruction
Top Section
- Buying Cart: Purchase the software license directly in the software(Activate the software directly after purchasing and no need the license code).
- Register menu: It displays your email address or Facebook, Twitter, Google+ name. Also if you have already purchased the license and after login, you can find a VIP flag next to this account name, and most importantly, you can click the account name to check the License Validity Time.
- More Menu
– Online Help
– Activate
– Update
– Interface Language
– Feedback
– About
Front Section
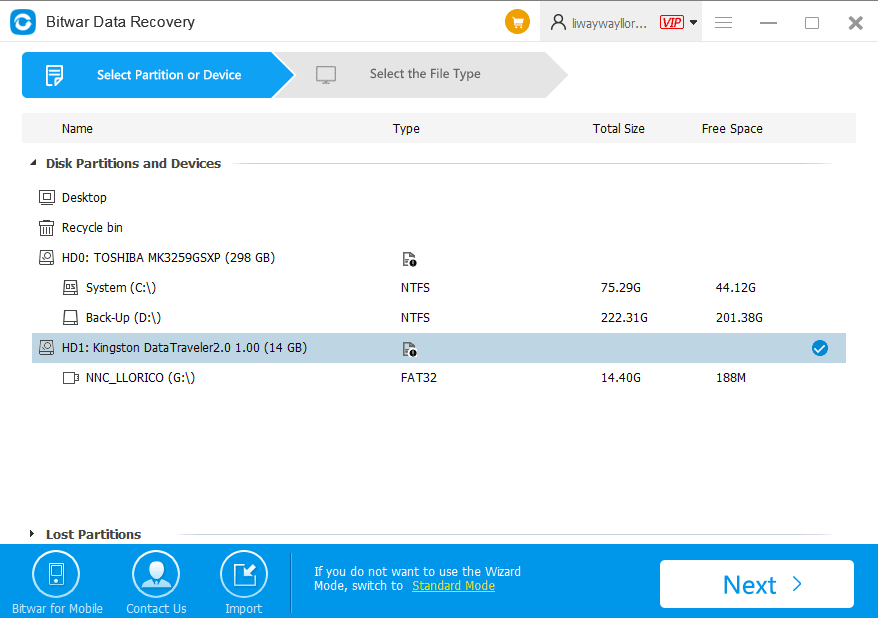
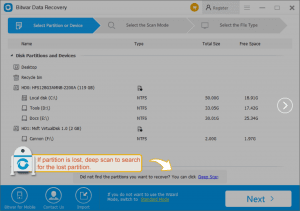
- Choose the device name starts from HD will guide you directly the Deep Scan mode, this is a way to scan the whole disk when your partitions become as inaccessible one.
- Click S.M.A.R.T Info icon will let you check the disk info and the disk status.
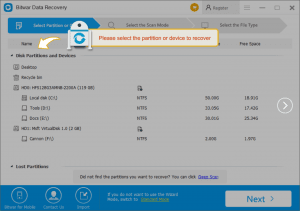
- Choose the partition or drive will guide you to select the Recovery Mode.
- Lost partitions section is only for scanning lost partition that deleted manually or by a virus.
- Type: Here will show the file system format of the hard disk. If the type shows as NTFS_RAW means the partition or drive has turned to RAW disk(Shows 0 bytes), but it still can be scanned by using Quick Scan
Bottom Section
- Bitwar for Mobile: Click here will download the Bitwar Android or iPhone data recovery software for Windows.
- Contact us: It’s a chatting portal that you can get help from customer service in real-time.
- Import: This allows you to import the scanned data from previous steps to shorten your time.
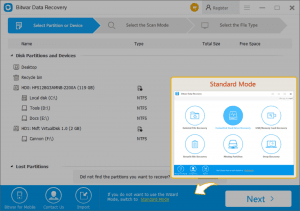
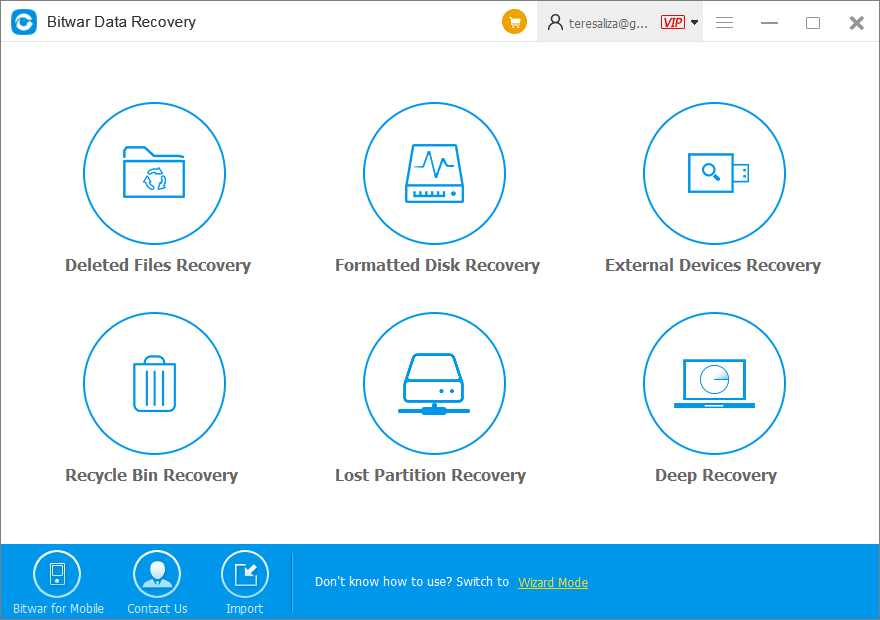
- Standard Mode: 6 standard used modules, such as Deleted Files Recovery, Formatted Disk Recovery, External Devices Recovery, Recycle Bin Recovery, Lost Partition Recovery, Deep Scan, which you can select the exact function to recover lost data.
Step 2 Recovery Mode Interface Instruction
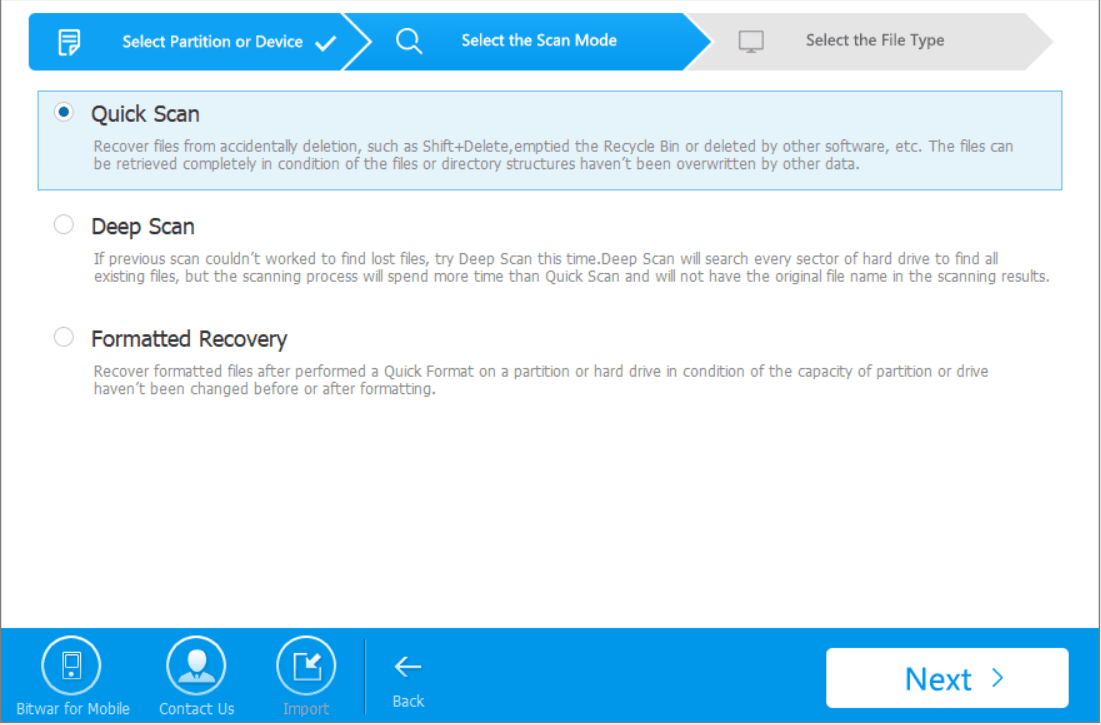
Quick Scan: This is a mode that provides the original file name, file path, last modification time and folder structure and shorter scanning time. You can start from this mode to scan the lost data first and if this mode cannot find your data, try Deep Scan next.
Deep Scan: This is a mode that can search every sector zone from the hard disk (May spend more prolonged time than Quick Scan), and due to the missing meta info, it only offers the file name starts from FileXXXXXX; however, it can find more files than Quick Scan.
Formatted Recovery: Recover data from the formatted hard drive, SD card or any other storage medium.
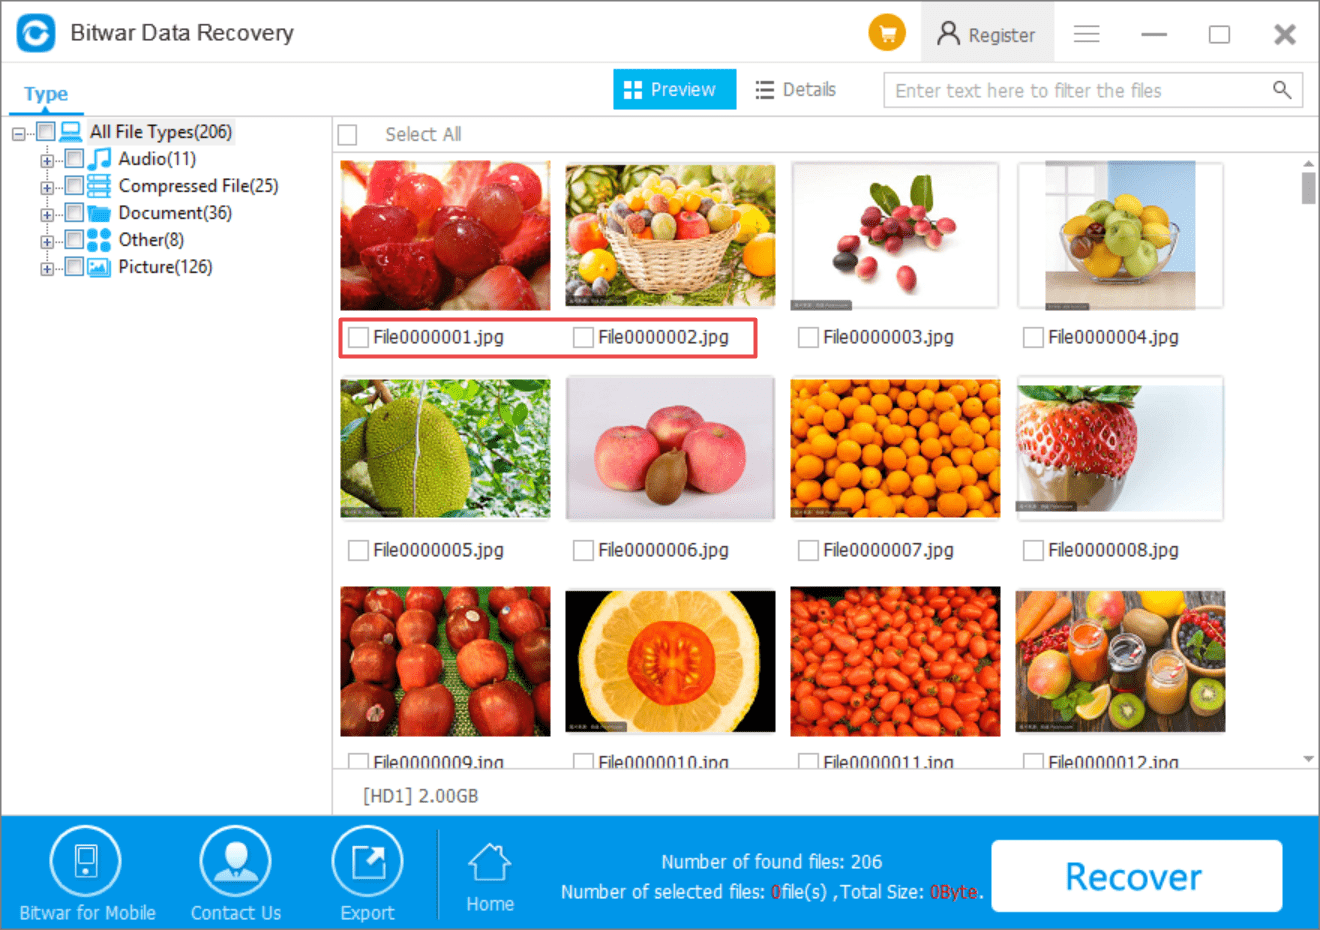
Step 3 Select file types Interface Instruction
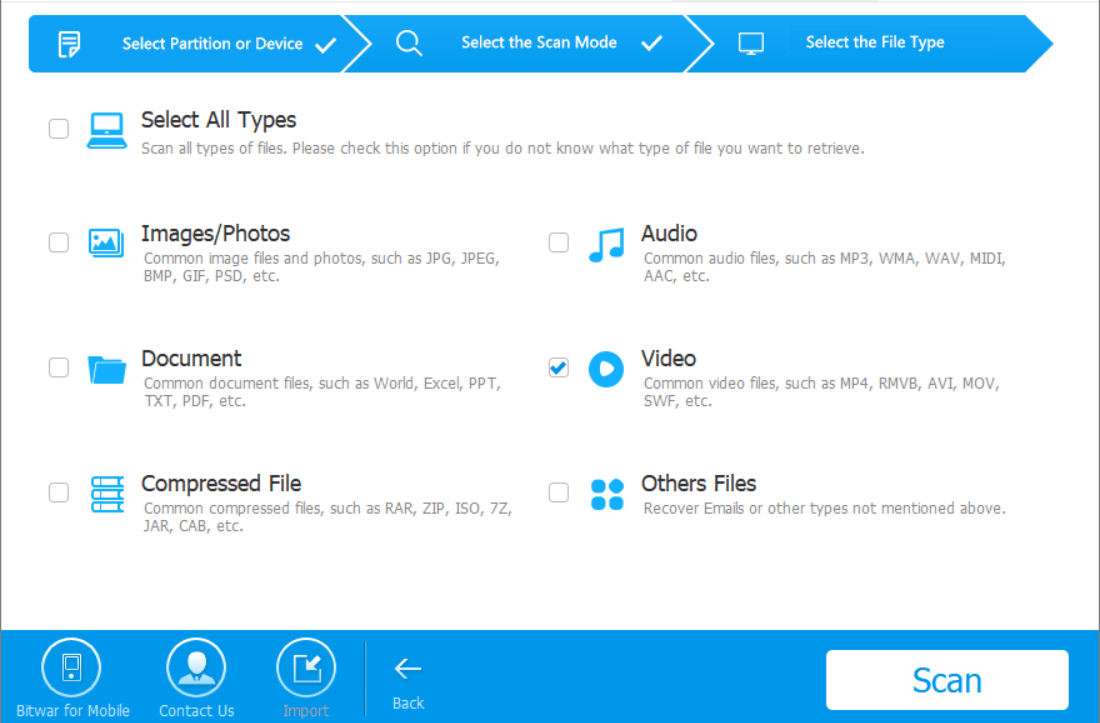
Images/Photos: All major images/photos formats supported.
Audio: All major audio formats supported.
Document: All major Document formats supported.
Video: All major video formats supported.
Compressed File: All major archive file formats supported.
Other files: Emails and other useful data formats do not include from types mentioned above.
Step 4 Scan Interface Instruction
Quick Scan & Formatted Recovery Scan Interface
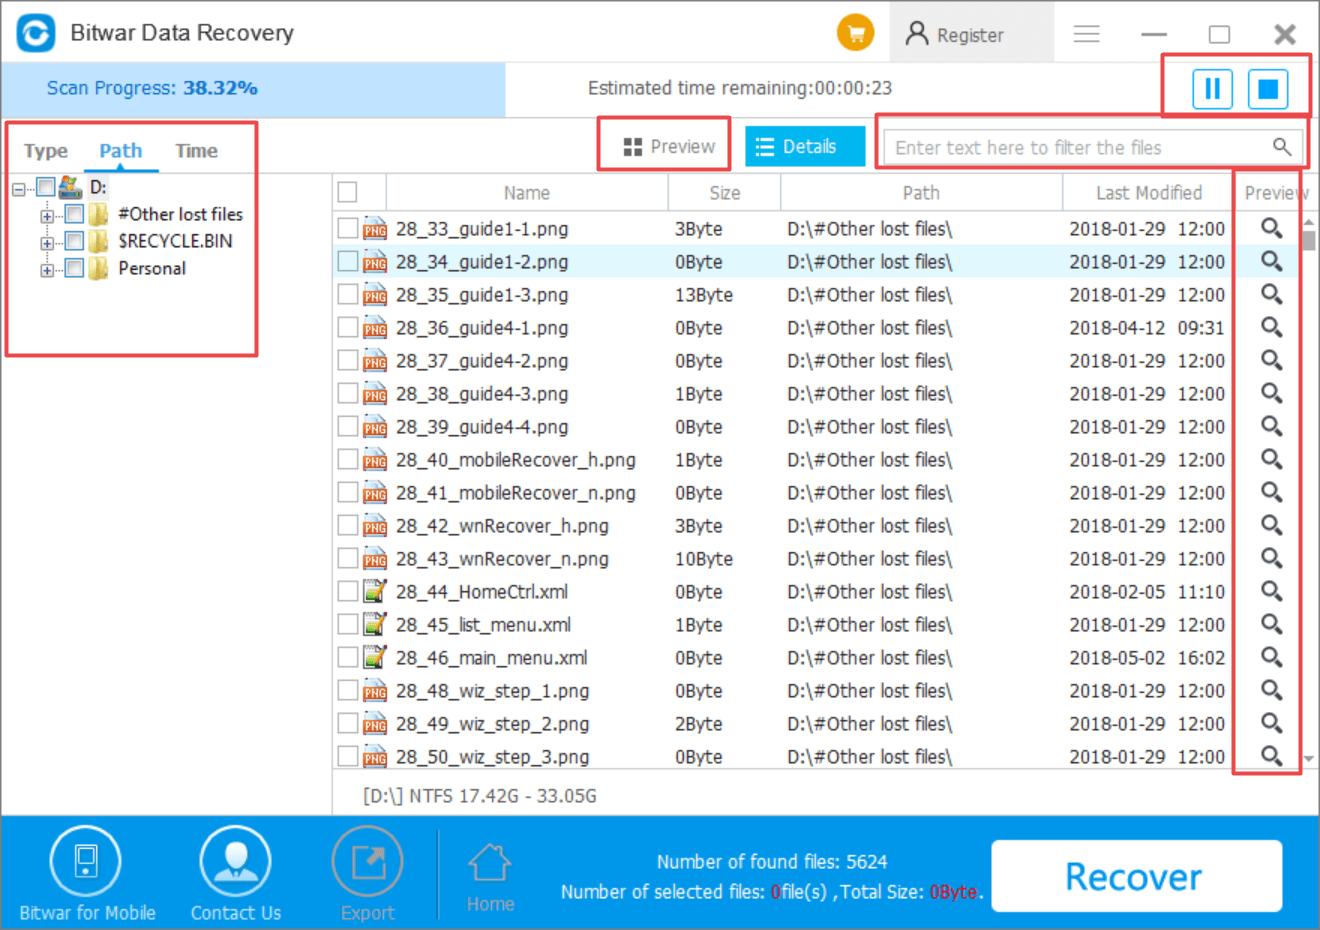
- Progress Bar: Shows the current scanning status and estimated time remaining and also offers a Pause and Stop button.
Left-Zone
- Type: Contains All of the file formats which have been scanned by software
- Path: Show the original file paths belong to the lost data.
- Time: It’s the last modification time of the lost data, not creation time or modified time.
Front-zone
- Preview Tab: Which you can generate the thumbnails for each file that users can preview the data easily and quickly.
- Details Tab: Lists the file per line, and shows name, size, path, last modified time and offers a magnify icon.
- Search Bar: support the filter the lost data by entering the file name.
- Deep Scan Green Bar: If you couldn’t find the lost data by using Quick Scan, click the green bar to turn to Deep Scan.
Four ways to preview the lost data
- Double-click the file to preview
- Right-click file and choose Preview
- Click the magnify icon to preview
- Turn to the Preview tab to generate the thumbnails for each file.
Multiple Files Selection Function
- Hold the left mouse key and drag to select the files you want (Support infinite scrolling and reverse selection).
- Hold the Shift key and select the first file to highlight it, scroll down and tick the last file you want.
Three ways to recover the lost data
- Multiple Files Recovery
– In Details Tab or Preview Tab, select all the target files and high the bottom Recover button
– In Details Tab or Preview Tab, select all the target files, right click and then choose Recover
- Single File Recovery
– In Preview Window(Zoom Window), click the Recover to recover file one by one.
Bottom Zone
- Bitwar for Mobile
- Contact US
- Export: Allows you to export the current scanned data with the suffix .bw, you can save the result for future use(Please don’t save to the questioned partition or drive).
- Home: Return to the index page, however, to prevent the users from clicking mistakenly on this button, there’s a popup Window to ask you to choose:
– Save results and return home
– Continue to view results
– Return to home without saving results
Ways to save the lost data
- After clicking the Recover button, it will ask you to save the files with the original folder structure or put into the same directory.
– Recover while maintaining the original directory structure, if you have many folders have been lost, we strongly recommend you to use this function
– Restore to the same directory; it will save all of the selected files into the same directory.
Deep Scan Interface
This mode will only show the file name starts from File XXXXXXX do not contain the original folder structure due to missing meta info.
Tips:
Please don’t save the files directly to the question partition or drive to prevent permanent data loss.
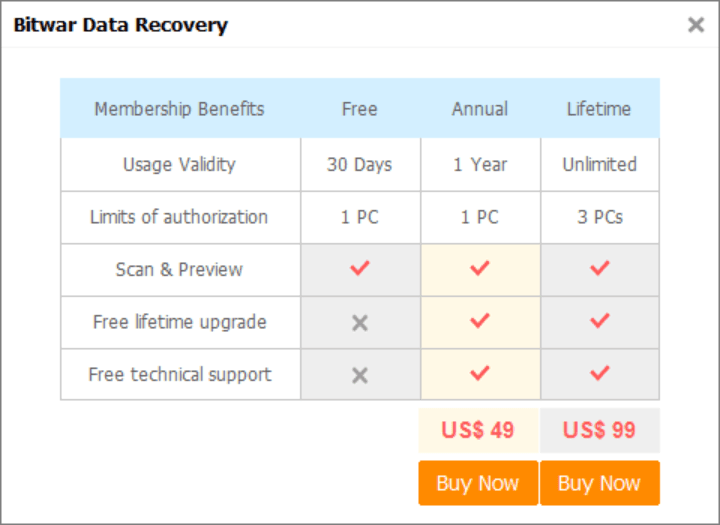
Difference between Free Membership, annual membership, lifetime membership
Free Trial members can recover up to 1gb amounts of data for free.
Annual Membership allows to recover anything and unlimited data during one year and supports to install the software in single PC.
Lifetime membership allows to recovery anything and unlimited data in whole life and supports to install the software in 3 PCs.


Hey! I have Bitwar since few weeks ago and didn’t see this article haha! I think the software is very friendly and intuitive, so I never had to search how to do anything, but it was nice to check all the options very well explained. For those who are starting to use it, I recommend always doing a quick scan at the beginning, and if is not enough, then the other one, I went straight for the deep scan and took a few to be ready, and it wasn’t necessary hehe, that’s it!
Comments are closed.