

Summary: Through this article, we will take you through some of the best ways to fix the “Internal hard drive recognized as removable” issue and create a backup of your system data using Bitwar Data Recovery Software.
Many computer users have reported the issue “Internal hard drive recognized as removable.” This issue happens when the installed SATA AHCI drivers are not synchronized with the BIOS or computer’s motherboard. In such a case, the best thing to do is to install the most recent drivers like SATA related drivers.
Besides, the issue also can show that the external USB flash drives are appearing to be removable. Many users would think that restarting their computer system will fix the problem out. However, this would not be a solution to overcome it.
If you ever encounter this type of situation, follow the article below as it will provide you with the most effective solutions to resolve the issue “Internal hard drive recognized as removable.”
Table of Contents
Fix “Internal Hard Drive Recognized as Removable” Issue
Method 1: Enable Caching Policy
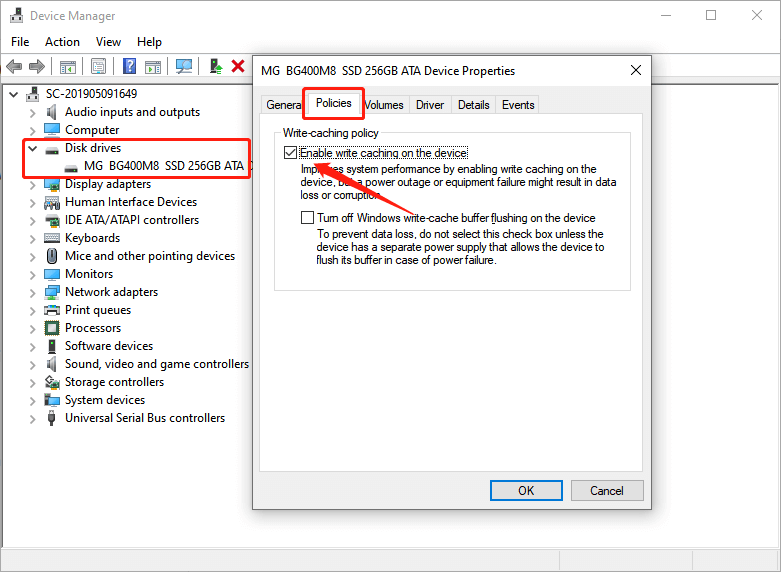
Caching Policy is an unpopular setting in Device Manager on the Windows system, in which few users find this useful to solve the issue.
Follow the guided steps below to enable Write Caching Policy:
Step 1. Open Device Manager from the system by right-clicking Start menu.
Step 2. Choose Disk Drives and right-click on the Internal hard drive (SSD or HDD).
Step 3. Choose Properties.
Step 4. After this, under the Policies tab, check whether Write caching on the device is enabled and no Optimize for quick removal enabled.
Method 2: Check BIOS
Users need to check the BIOS for any latest version because outdated versions may cause several bugs and issues, including “Internal hard drive recognized as removable” issue. So, please check the model number and go to the manufacturer’s website to download or update to the latest version.
Refer below to check the model number:
Step 1. Press Win + R to open Run.
Step 2. Type in msinfo32 and click OK.
Step 3. Find the item name with BIOS Version/Date and take note of the Value.

Step 4. Go and visit the motherboard manufacturer’s website and Search for the model number and look for any available updates.
Step 5. Install and check to see if the internal hard drive is still removable.
Method 3: Disable SATA Hot Plug
Enabling the Hot Plug option will allow the system to determine that the internal hard disk as a removable device. Therefore, users need to disable it, which can solve the issue by following the steps below:
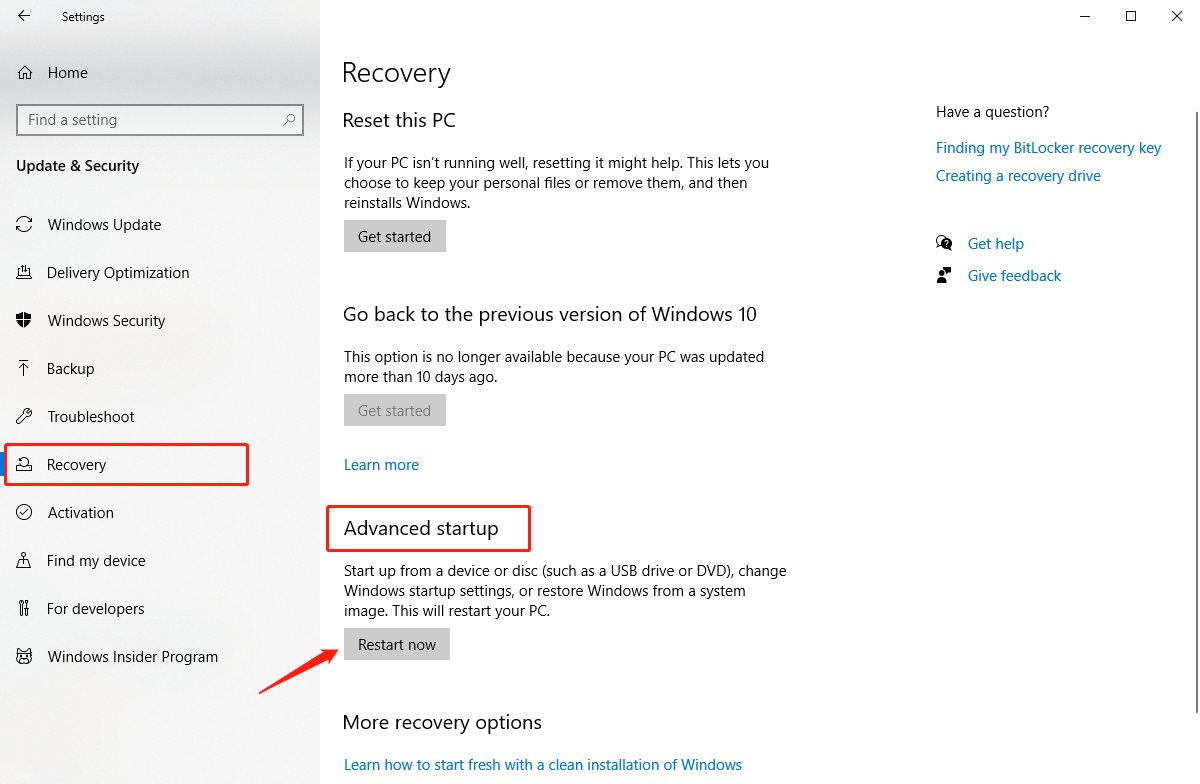
Step 1. Press the Win + I to open Window Settings.
Step 2. Choose Update & Security from the settings.
Step 3. From the left menu bar, click the Recovery menu.
Step 4. Below the Advanced Startup, click Restart now button.
Step 5. After the computer restart, click Troubleshoot. Then, select Advanced options.
Step 6. Click UEFI Firmware Settings and click on the Restart button again.
Step 7. After restart again, the Windows system will bring you the BIOS.
Step 8: Check the SATA port and remember to disable the Hot Plug tool.
Another Solution Worth a Try!
If the methods above fail to resolve the “Internal hard drive recognized as removable” issue, it is recommended to create a hard drive data backup with the help of the best recovery tool Bitwar Data Recovery Software because the following solution may cause data loss on the system.
Data Backup with Data Recovery Software
Bitwar Data Recovery Software provides 100% data recovery from any devices such as hard disk, USB drive, SD card, and memory card, etc. The recovery tool is highly reliable and efficient.
It supports Windows 7/8/10 and Mac system. Also, it restores all sorts of data, such as xl, doc, audio, video, pdf, etc.
Follow The Steps Below to Backup the Data For “Internal Hard Drive Recognized as Removable” Issue:
Step 1. Download Bitwar Data Recovery Software on your system.
Step 2. Launch the recovery software and select option Deleted File Recovery.
Step 3. Select on the Partition or Disk that contains your files and then click on the Next button.
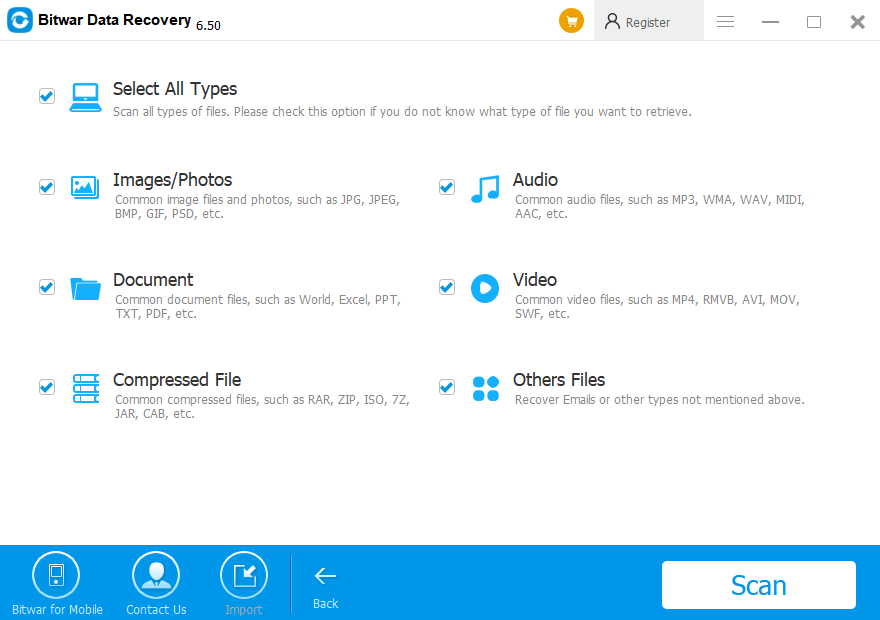
Step 4. Choose the File type which you want to restore and click on the Next button.
Step 5. Preview the selected data and then click on the Recover button to start the recovery process.
REMINDER: Once the desired files are extracted, AVOID saving these files to the SAME Disk Drive or Partition in whcih you lost them.
Method 4: Command Prompt
Modifying the registry is a risky process and has to be done very carefully! Ensure to create a Hard Disk Data Backup by referring to the meabove before proceeding to modify the command prompt.
Once you have successfully backup all of your data, follow these steps:
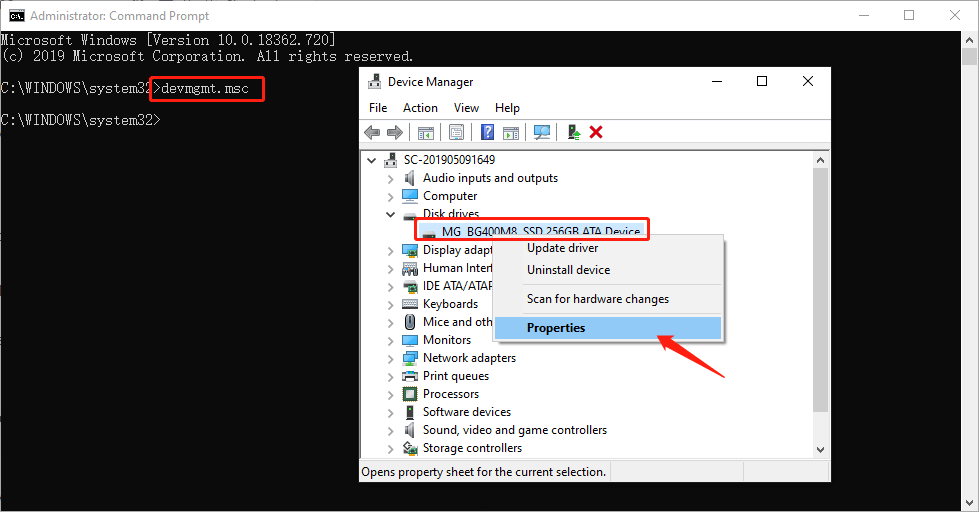
Step 1: Press Win + Q and type in Command Prompt and Run it as an Administrator.
Step 2. Enter the command devmgmt.msc in the Command Prompt and press Enter to execute.
Step 3. Now, in the Disk Drivers, look for the SATA device that you would want to be considered internal by the inbox driver. Then right-click the drive and select Properties.
Step 4. From the properties overview note down the bus number as 1, and type the below command in the already opened command prompt window followed by hitting the Enter button.
reg.exe add “HKLM\SYSTEM\CurrentControlSet\Services\storahci\Parameters\Device” /f /v TreatAsInternalPort /t REG_MULTI_SZ /d x
(Here, x is the bus number noted down from step 4).
Solve It Now!
When an internal drive, SSD or HDD, shows up as removable for some reason under ‘Safely Remove Hardware and Eject Media’ in Windows OS, it is due to conflicts between the installed SATA/AHCI drivers and computer’s motherboard. Though there is a straightforward method to resolve this concern, however, it is not a 100% successful solution.
If the“Internal Hard Drive Recognized as Removable” issue is not fixed using the first method, then go for the command prompt. It is a risky process as there are high chances of data loss involved in modifying the command prompt. Therefore, it is best to do hard drive data backup to avoid any hassles using Bitwar Data Recovery Software!


