

Summary: This article will take you through some of the ways which can help to solve the error stating “Can’t unmount disk mac”. Follow the given steps and get rid of the problem.
“Can’t unmount disk error on Mac” mainly occurs when the system is restricted to repair or fix specific directories or permissions in Disk Utility. For example, when a device cannot erase the drive or attempting to fix the pen drive!
Due to such issues the user may end up getting one of these error messages “Disc erase failed couldn’t unmount disk.” or “Disk Erase failed: Couldn’t unmount disk”.

This error message may lead to few other issues, such as corrupted or lost data on the pen drive or external hard drive, unable to open some files and folders and unable to partition Mac HFS.
If you have ever suffered from such issues, then stop worrying! As there are plenty of ways that can help you sort this problem, all you need to do is to follow any of the below-given methods to overcome the concern.
Table of Contents
What Causes the Error “Can’t unmount disk Mac”
There are plenty of reasons associated with such an error message on Mac; we have listed a couple of them below:
- Modified or corrupted boot drive.
- Drive being used by any other application or process.
- An issue with the internal drive.
How to fix “Couldn’t unmount disk Error on Mac”
Following are some of the solutions that can help to fix the error message “Couldn’t unmount disk on Mac”.
Solution 1: Fix the error “Can’t unmount disk mac” using the USB Boot drive
It is the most common solution to fix the error with the support of Boot drive. If the Boot drive was not there, then the error would have remained unresolved.
Step1: Be sure that the USB Drive is connected to your Mac device and then start to reboot the system.
Step2: Now, when the boot process holds the “Option” key, select the option “attached boot drive” from the utility menu.
Step3: After this step, from the Boot menu access Disk Utility. (If you are using Installer disk, then go to the “Utilities” menu and click on “Disk Utility” option).
Step4: Go to option “First Aid”, verify the disk and start repairing the drive if required.
As you can see a boot drive is essential in this case. These steps should eliminate the issue, but if this method fails to do so then opt for the following method.
Solution 2: Fix using a Recovery Partition
This method can be beneficial when the disk error occurs while formatting a non-booted partitioning or by First Aid.
Step1: Reboot your device (Mac) and hold the “Option” key while booting.
Step2: Then, choose “Recovery Partition” option from the Boot menu.
Step3: From the Boot menu select “Disk Utility” and go to “First Aid” to verify and repair the disk or go to “Erase” if you wish to format the disk.
This method will not work if the disk which is throwing this error and the primary boot partition is the same.
Solution 3: Fix using Command line
The error message “Can’t unmount disk” can also be eradicated from Mac using the command line. Follow the given steps to learn more.
Step1: Access the “Terminal Application”.
Step2: Then, type “diskutil list” to get the list of all the disks on Mac.
Step3: Now, search for the disk you want to force unmount.
Step4: After finding the disk, type “sudo diskutil unmountDisk force/dev/diskx” line and replace “/dev/diskx” with “/dev/disk1” which is an acceptable disk number.
Following the above-listed steps carefully! If you still find that the drive is failed to get mount on Mac and requires recovery then, use “Bitwar Data Recovery Software for Mac” to recover all your data.
As professional data recovery software, Bitwar helps you recover deleted files after emptying the Trash, formatted data, hidden data on external hard drive, data lost due to can’t unmount disk error or unreadable disk.
Recover Data on Mac using Bitwar Data Recovery Software
- Download and install the free data recovery software for Mac.
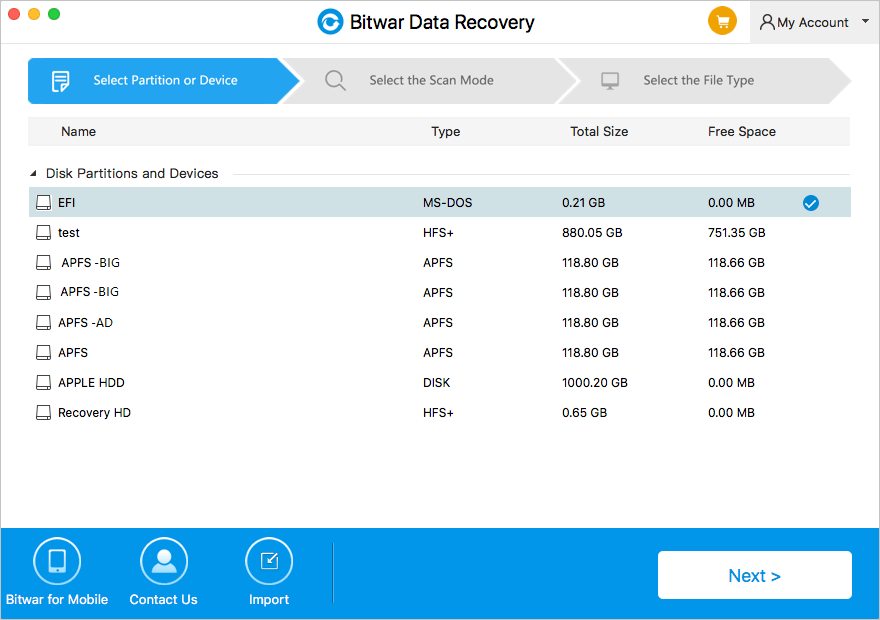
2. Once the software is launched, choose the option “Unmount drive” on Mac and click on “Next”.
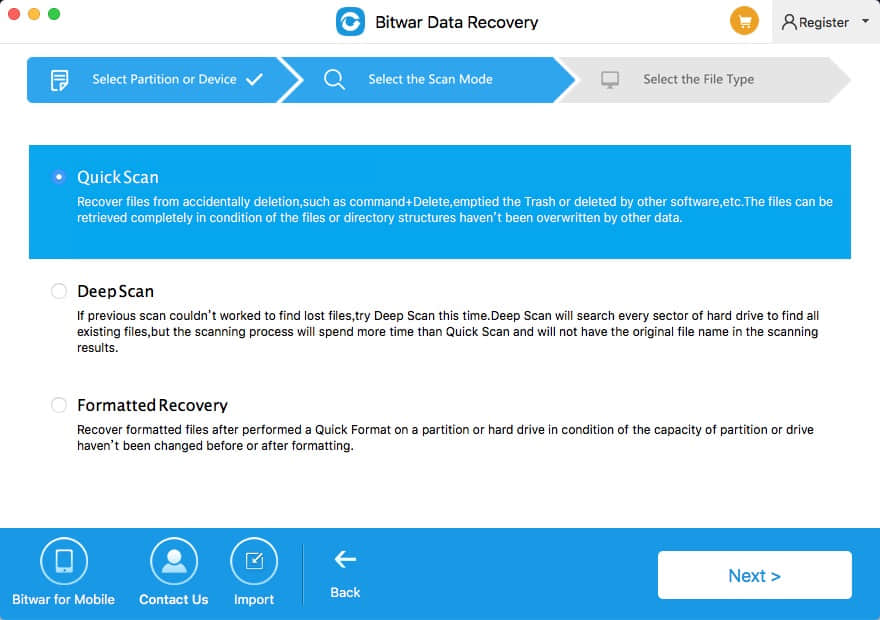
3. Click on “Quick Scan” option to scan the files, if you are unable to find the files with this option, then choose “Deep Scan” to search for the file(s) in every sector of the hard drive.
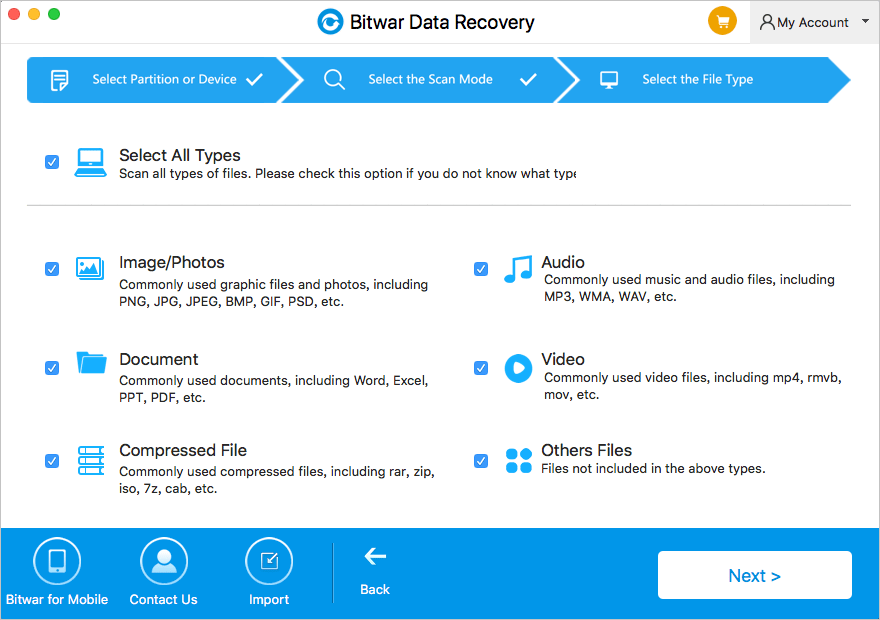
4. In this step, check the types of files you wish to retrieve. In case you are not sure about the kinds of files, then select the option “Select all types” to restore all types.
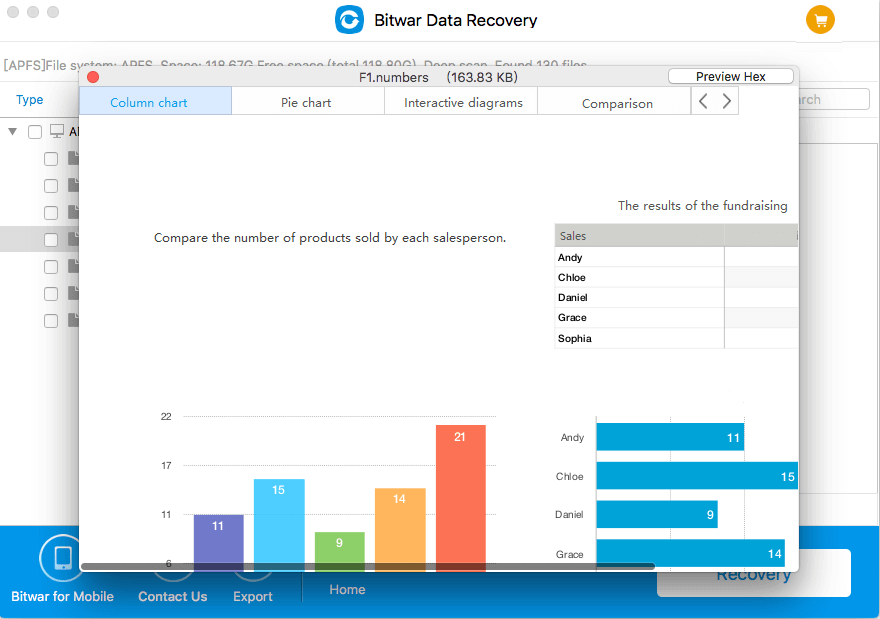
5. Once scanning is done, filter out the lost files by their type and name, and then preview these files for selective recovery. After this, check the files that you want and click on “Recover” to save them in your Mac device.
Must Read: How to Disable System Integrity Protection (SIP) on Mac OS
Conclusion
Anyone can come across the error “Can’t unmount disk on Mac” during disk verification, partitioning and formatting, which do not allow you to repair or erase the directory or permissions in Disk Utility. There are many solutions which can help you solve the issue, but in some scenarios, these solutions may not even work. Therefore, making it imperative to recover the data to avoid any loss!
Here, we would highly recommend using Bitwar Data Recovery Software for Mac due to its powerful functionalities for recovering data from APFS, HFS, HFS+, NTFS, FAT and ex-FAT on internal or external hard drives.
Don’t Miss: How to Fix External Hard Drive Not Showing Up On Mac
Moreover, the tool is completely compatible with both Mac 10.7, 10.8 and 10.9 to Mac High Sierra and MacOS Mojave recovers any data with simple and user-friendly steps.
So, follow this user guide and learn simple steps to fix “Can’t unmount disk Mac” error and recover files using the best data recovery tool- Bitwar Data Recovery software.


Thank you for outlining this process! I looked around for a while until I found this article, by far the clearest and easiest to follow.
Comments are closed.