

Summary: This article explains the efficient ways to recover deleted files from external hard drive for Mac by Trash restoration and third-party data recovery software.
Did you know that it is possible to recover deleted files from your Mac? Yes, even with formatted hard drives or from the accidentally deleted folder, it is still possible as well!
It doesn’t matter what kind of an external hard drive for Mac that you have, an external thunderbolt drive, or perhaps a USB drive. Whichever you used to connect to your computer, restoring files from them is possible with a recovery process called Data Recovery for Mac.
Table of Contents
Free Solutions to Recover Deleted Files from External Hard Drive for Mac
When you delete the files from your Mac external hard drive or empty the Trash on the internal Mac hard disk, it’s usually stored in Trash. It’s the simplest thing you can do to restore your files. Just Restore it from the Trash!
But for some of us will empty the Trash now and then because we don’t want to see our Trash with the crumpled papers. But does that mean the files emptied from Trash would be gone forever?
Not necessarily.
Let’s take a look at the reasons below why we can recover deleted files after emptying the Trash on Mac!
How Does Data Recovery Works?
When deleting a file, it doesn’t disappear from the existence file location quite yet. The data in it loses its Address in the operating system. That’s why it goes. It no longer has a place in the operating system, but the data is still exiting somewhere in the hard drive, waiting to be overwritten by new data.
When you create a new file, and it takes up the space that your deleted files once occupied, that would be the time that your deleted data is replaced and truly gone. But before that happens, you can still retrieve those files back quickly.
However, it would require you to install third-party software, which is the Mac data recovery software that can scan your hard drive for deleted files and get them back. Don’t worry! The Mac data recovery software tool isn’t more than 40MB big. So it won’t be a hassle installing them.
How Bitwar Data Recovery for Mac Works?
One of the best mac data recovery software you can use is Bitwar Data Recovery for Mac. It is a very user-friend software that the whole data recovery process takes up to THREE simple steps only!
You also can set it to a few various settings that will cater to whatever needs or situations you require data recovery, e.g., can’t umount disk error, external hard drive not showing up on Mac, unreadable disk, as far as recovering deleted files that you need.
First, you need to download free trial Bitwar Data Recovery for Mac. It compatibles with the disk file system format, such as HFS, HFS+, APFS, FAT, exFAT, and NTFS-formatted external hard drive on all released Mac OS X, but Mac has only limited support on Windows-based volume. You can only access the data but have no chance to edit, copy, or delete.
Download for PC Download for Mac
Then if you would like to recover data from an NTFS-based external hard drive, we suggest you use Bitwar Data Recovery Software for Windows. We also support platforms such as Android and iOS, just in case you would need them in the future.
Steps to Recover Deleted Files from External Hard Drive for Mac
Bitwar Data Recovery for Mac, which supports Mac OS X (10.11 to 10.12 Sierra, 10.13 10.14 Mojave) on iMac, MacBook, Mac Pro, etc. Before proceeding to the three-step process to retrieve deleted data from your external hard drive on Mac, you need to create an account.
Important Note: When performing data recovery on Mac, you should refer to this tutorial ‘ Disable System Integrity Protection (SIP)’ first, to learn how to disable Mac SIP.
Step 1: Select Drive or Partition
You will see a list of all detected drives and partitions, both internally and externally. So, you need to make sure to connect your external hard drive to your computer. Otherwise, it will not appear on this list of drives and partitions.
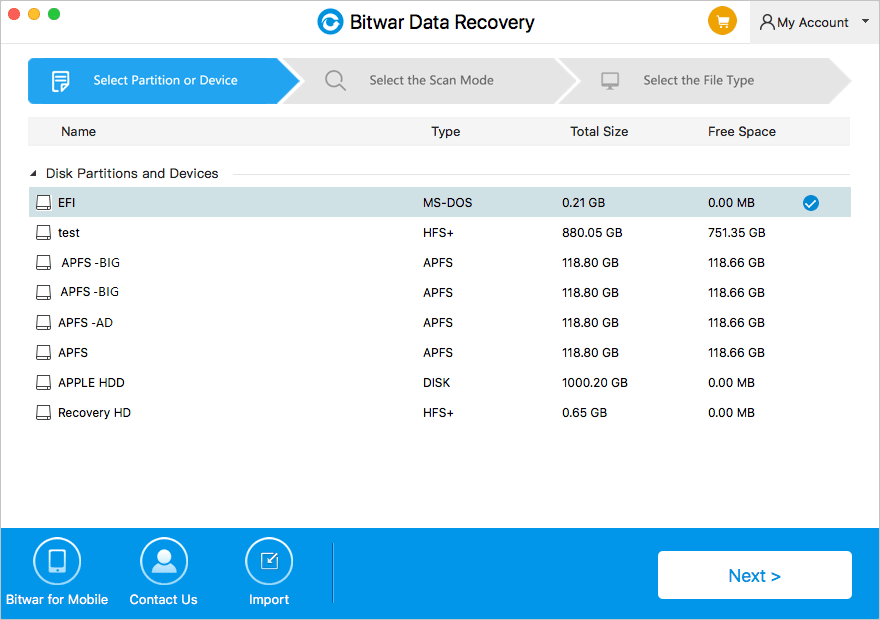
Select your external hard drive from the list and click Next to proceed to the next step.
Step 2: Select Scan Mode
As we said that Bitwar Data Recovery caters to various needs and situations when it comes to recovering deleted data, this is the step where you get to choose what kind of scan you need.
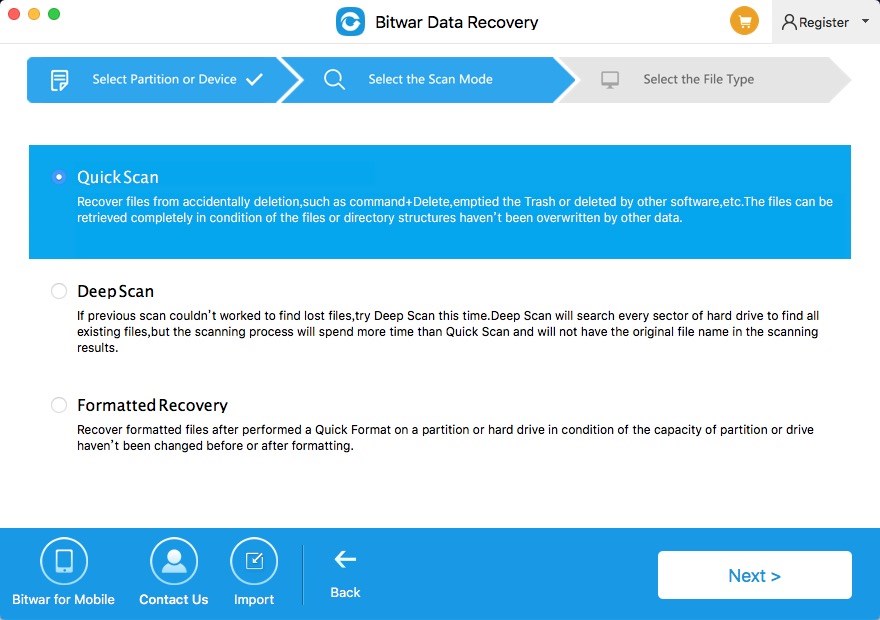
There are three different scan modes in Bitwar Data Recovery. Each has its use, speed in scanning, and even the depth of the scan.
Quick Scan
The fastest and most basic scan mode that you should go for is this scan. The reason for this, aside from being the fastest scan mode, it also retrieve files with the file names and details!
Deep Scan
This scan mode goes through all the sectors of your hard drives up to the industries which the Quick Scan doesn’t usually reach. This produces more results but takes more time to scan.
Additionally, since it gets results from the deepest sectors of your hard drive, the files recovered will not be with their original filenames and other details. They will have generic filenames and will be difficult to identify unless you preview them after scanning. We will discuss more on that later.
Formatted Recovery
Lastly, the formatted recovery mode can retrieve files from the formatted hard drive. If you find yourself needing to recover some files after formatting, this would be a first scan mode to go with.
After choosing your scan mode, click Next to proceed to the next step.
Step 3: Choose File Type
This third step is useful for making your scan more target-specific for the files that you need. If there are specific file types that you need recovering, tick the boxes corresponding to them. If you need all the file types, click Select All Types.
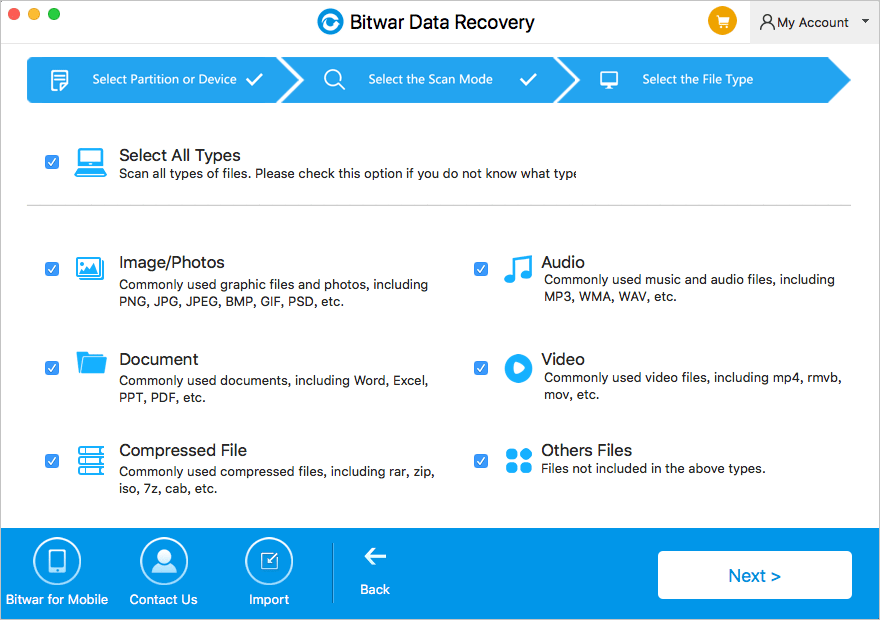
After this, click Scan.
Step 4: Preview Your Files
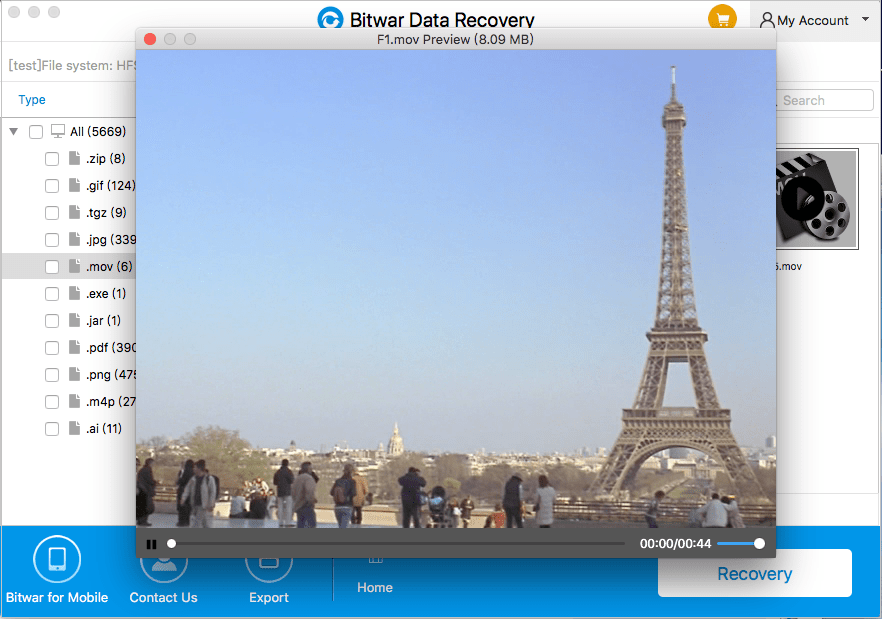
As the software is running to scan your drive, the results will be showing up. We strongly recommend previewing your files as this the best way to check if the data are still functional. Some data that have been partially overwritten will come out as corrupt files during this step.
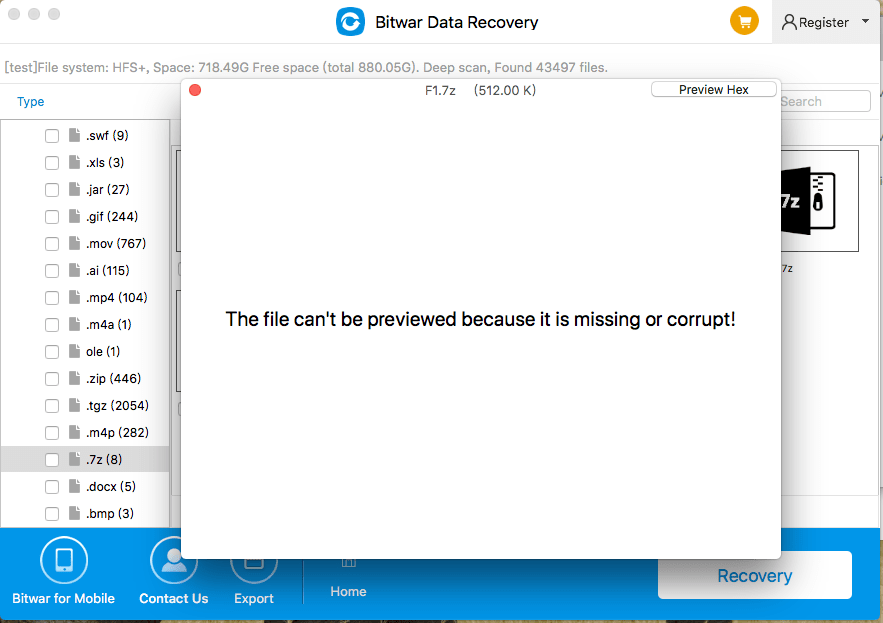
As you preview your files as well, you will already have the Recover button, so you can go straight to getting back your data right after making sure that they are still in good condition. Choose a safe path for your data and keep it.
NOTE: Please Do NOT save the recovered files in the original drive location to prevent data overwritten!
Congratulation!
Now you know how to recover deleted files from the external hard drive for Mac! Download and install Bitwar Data Recovery for Mac NOW!


