

Summary: Through this article, we will introduce you to five solutions of simple steps to fix the issue “DISM failed on Windows” and recover all your data with the help one of the best recovery tools, Bitwar Data Recovery.
DISM stands for Deployment Image Servicing and Management, a built-in tool on Windows which works through the command line and functions to let windows administrators prepare images before transferring to the user.
At times users witness a number of failure messages as below related to this tool while running it in command prompt, which doesn’t let them access their data/files. If you are facing this problem, don’t panic, as this article will help you recover your data in convenient ways and fix the errors.
- DISM failed 0x8000ffff, 0x800f0954, 0x800f081f: The Source File Couldn’t be Found.
- DISM failure when attempting to copy boot files.
- Dism.exe failed validating command line, to load wim manager.
- DISM failed while processing command cleanup-image, add-package.
To fix the corrupted system files, your computer needs to execute a DISM command. It’s an essential command to resolve Windows system related issues. To resolve different sorts of DISM failures, the solutions are more or less common.
Table of Contents
Solutions to DISM Failed on Windows
Solution 1: Check the Antivirus Installed in Your System
The issue of DISM Failed on windows can also take place due to the antivirus installed in your system, which might interfere with your system and consequently cause the issue. If so happens, you can disable some of the antivirus features or simply disable your antivirus.
In case this doesn’t work out for you, just try removing the antivirus altogether and run DISM scan after that. If this works, you should consider switching to another antivirus.
Solution 2: With the Help of Windows Update Troubleshooter
Step 1: Open the Settings app in your system by pressing Windows+I.
Step 2: Go to “Update and Security” tab.
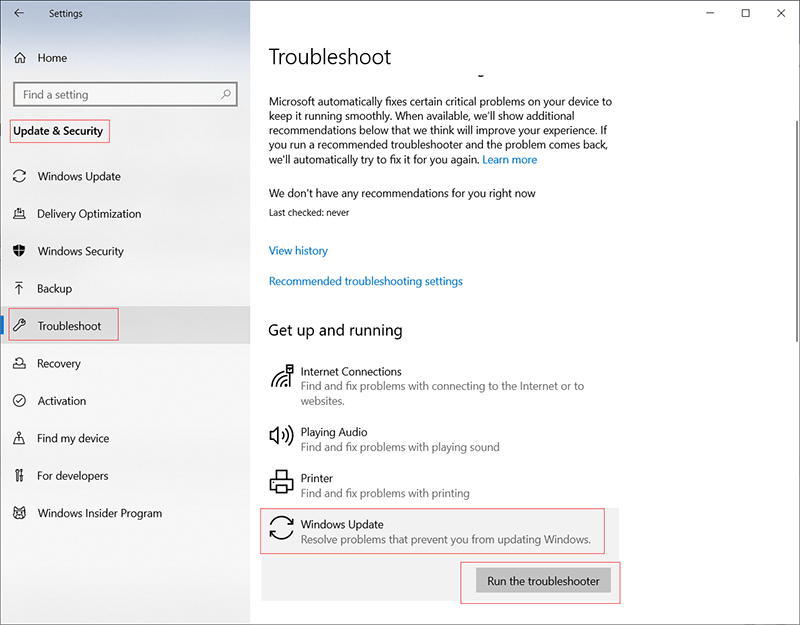
Step 3: Now, select “Troubleshoot” from the left side menu, then choose “Windows Update” from the right window pane, followed by clicking on the “Run the troubleshooter” option.
Step 4: Then, just follow the instructions as mentioned on your screen to troubleshoot the problem.
Step 5: Lastly, execute the DISM scan and check if the issue is fixed or not.
Solution 3: Clean up the System Image Components
Step 1: Launch the Command Prompt and run it as an administrator.
Step 2: Input the command “Dism.exe /online /Cleanup-Image /StartComponentCleanup” in the command prompt followed by pressing the enter key to execute.
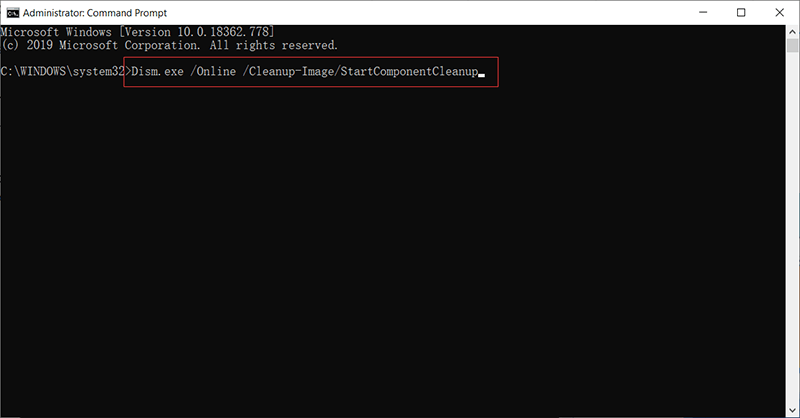
Step 3: Wait for the execution to get over.
The following additional commands can also be executed:
“DISM /Online /Cleanup-Image /StartComponentCleanup” and “DISM /Online /Cleanup-Image/AnalyzeComponentStore”.
Once you are finished executing these commands, perform DISM scan to check if the issue is resolved or not.
According to some of the users, the below mentioned commands also help in fixing the problem.
- “Dism.exe /online /Cleanup-Image /StartComponentCleanup”.
- “Dism.exe /online /Cleanup-Image /StartComponentCleanup /ResetBase”.
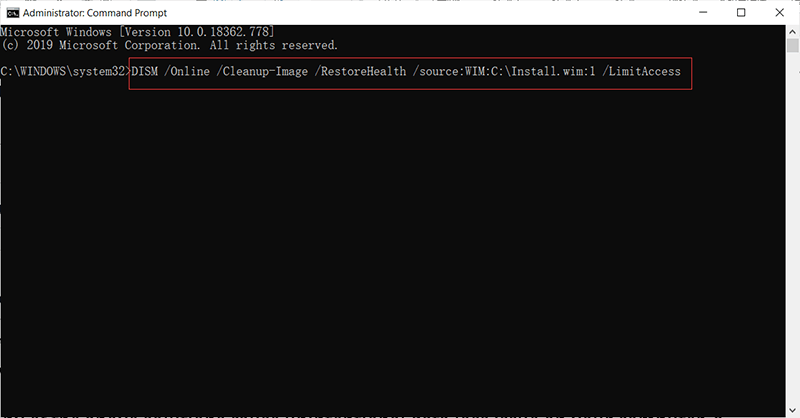
Solution 4: Correct the Location of the Install.Wim File
If you are getting the error message “Cannot find source files”, you would require to mount windows 10 ISO file.
Step 1: Launch Command Prompt.
Step 2: Enter the command “ DISM /Online /Cleanup-Image /RestoreHealth /source:WIM:X:SourcesInstall.wim:1 /LimitAccess” in the command prompt and press enter to run it.

Note: Make sure to replace “X” with the drive letter where you mounted Windows 10 ISO file.
Solution 5: Copy Install.Wim to Your Hard Drive
Step 1: Start with disk installation in your system or mount the ISO file, which can be found in the sources folder.
Step 2: After this, find and copy the “Install.wim” file followed by pasting it on local disk C.
Step 3: Now, execute the DISM command and make sure that you replace the location of the source file. For instance: Use the command “DISM /Online /Cleanup-Image /RestoreHealth /source:WIM:C:\Install.wim:1 /LimitAccess”, if the file is copied to local disk C.
Note: Be careful of the spelling of the name before running the DISM scan. The correct one is “Install.wim” with the first letter “I” capitalized. Some users reported that a name with a lower letter didn’t work.
If any of the above solutions cause unintentional data loss on your computer, a reliable data recovery tool will be needed to retrieve them. Here we recommend Bitwar Data Recovery, a user-friendly and powerful program, which can easily solve problems of that kind.
How to Recover Data Using Bitwar Data Recovery Software?
Step 1: Download the Bitwar Data Recovery according to the OS of your computer and install it in your system.
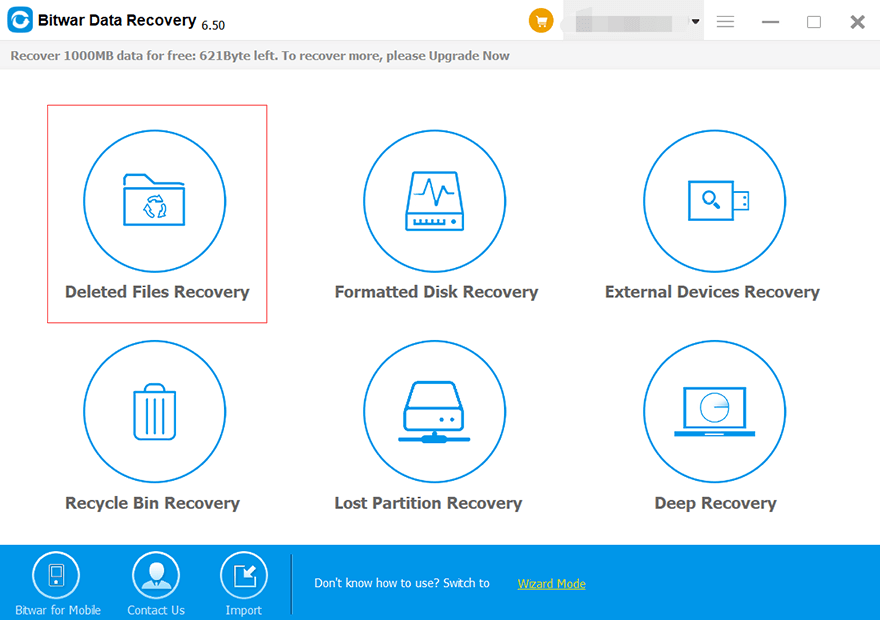
Step 2: Launch the program and select the “Deleted File Recovery” option.
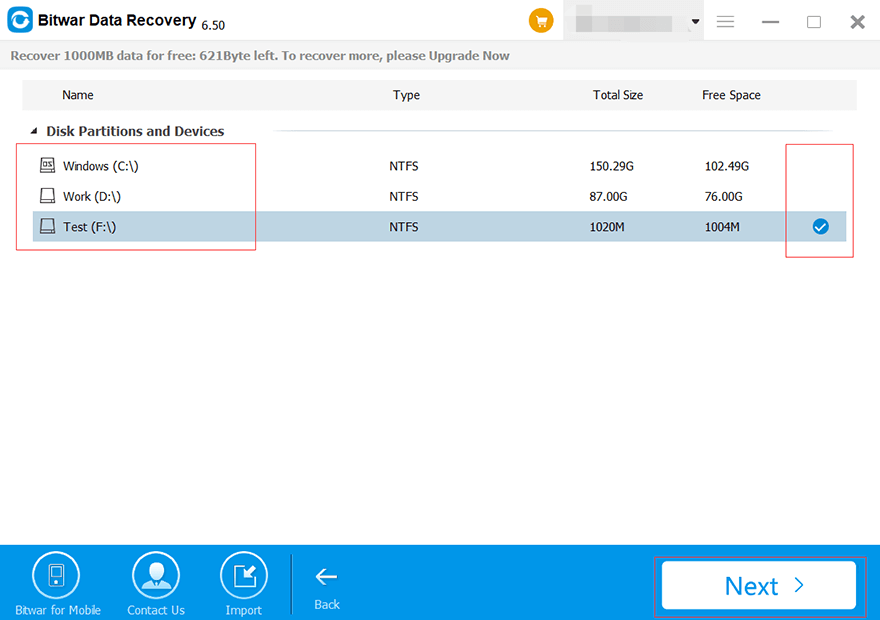
Step 3: Now, click on the partition where you wish to recover/restore the data and click on the “Next” button.
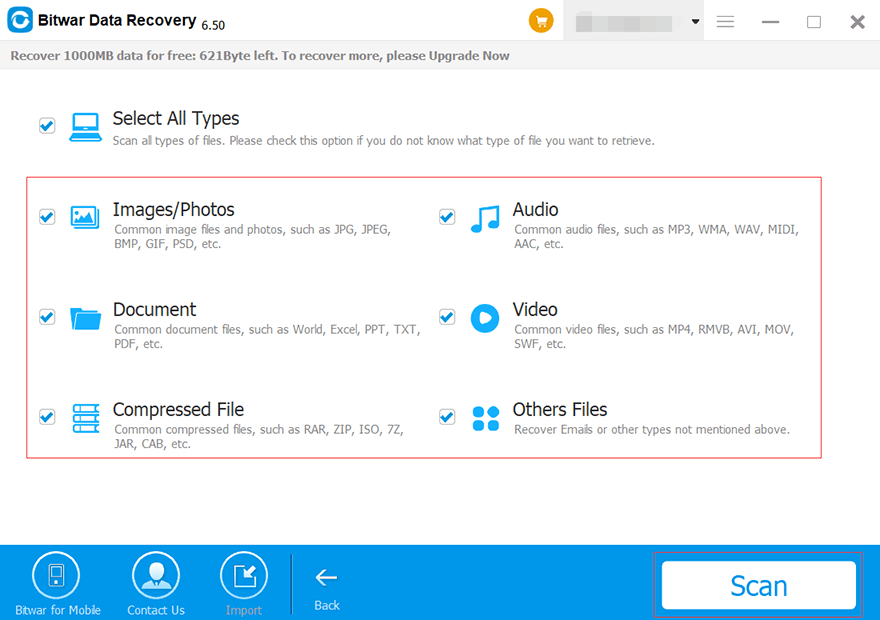
Step 4: Select the file types you want to recover, followed by clicking on the “Next” button.
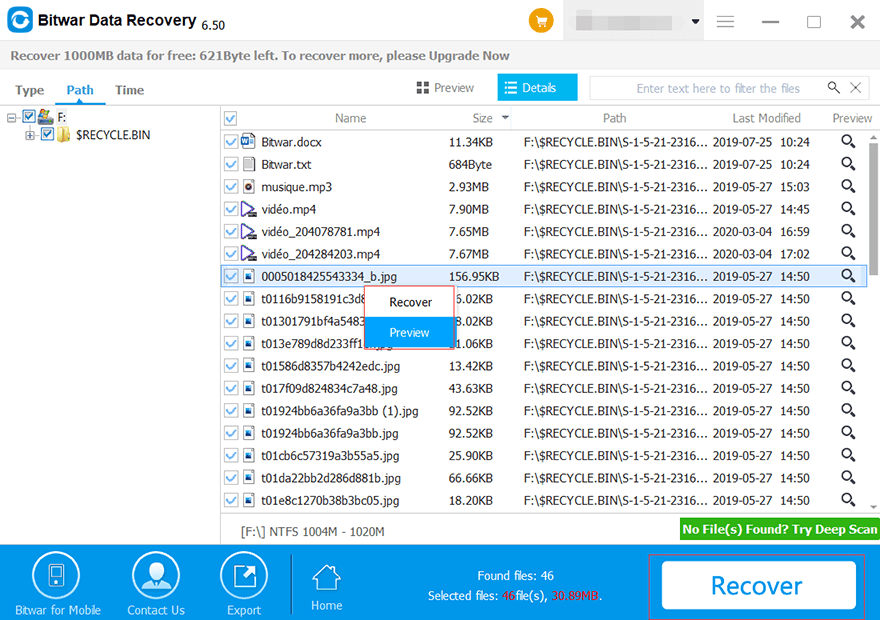
Step 5: Lastly, preview the selected data/files and click on the “Recover” button to start data recovery.
NOTE: It is recommended not to save the recovered data on the same storage device where you deleted it. Rather, save it to another storage device till the time when DISM failed on windows error is resolved.
Conclusion
There are various causes of DISM failed errors on windows, such as the wrong version of DISM used by the computer, incorrect command and command not executed into elevated prompt, etc. The above solutions can help you fix this problem.
Additionally, you can smoothly recover all your affected data using a powerful data recovery tool like Bitwar Data Recovery that provides 100% clean and desired results. Besides, this high-performance software can be downloaded for free and is highly user-friendly, so anyone with even the basic computer knowledge and expertise can use it.


I thought this would be so complicated but I'm so glad I could follow the steps pretty easy, thank you very much for the tutorial and having Bitwar for free is awesome!!
Thank you for your kindly comment, Angie, have a good day!
Comments are closed.