

Summary: In this article you will get to know how to fix Windows cannot Run Disk Checking on this Volume because it is Write Protected and how to back up your data with Bitwar Data Recovery before you have finished formatting the disk.
“Windows cannot run disk checking on this volume because it is write protected” is quite a common error among the Windows users. It generally appears if the drive or the partition is damaged or they are designated as “Read Only”.
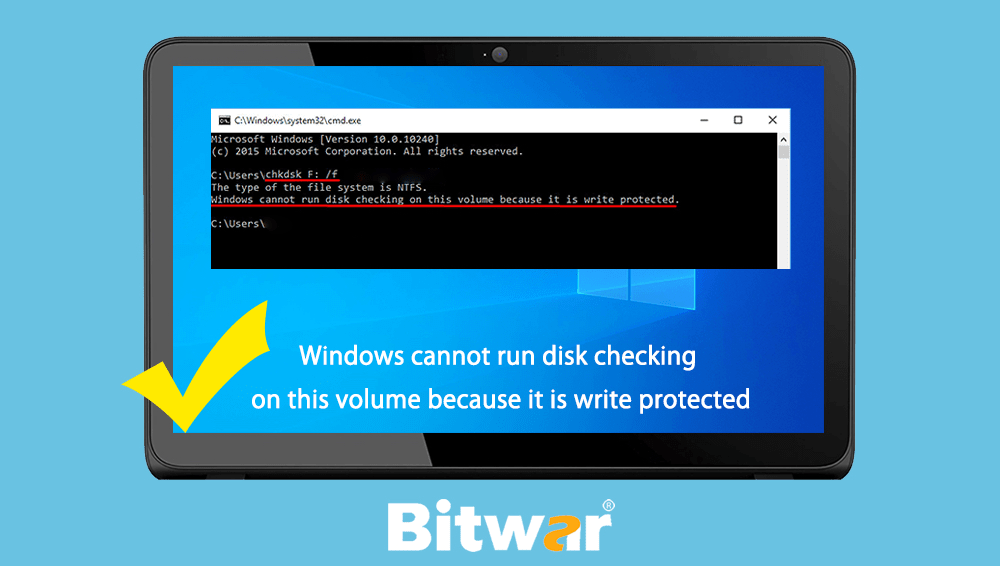
Almost the majority of Windows users have faced such circumstances and the way out is “CHKDSK”. It is a Windows command-line utility, using it you will be able to look for the damaged sectors of your partitions and it also verifies the integrity of the system files on the drive. So, launching this utility may prompt an error which basically states that the drive is corrupted or write protected.
If the drive is really write protected then you won’t be able to change or edit anything. You won’t even be able to remove the said files. Basically, write protected means that the drive is designated as “Read Only”.
Table of Contents
What Is the Cause of The Error?
Generally, most of the Windows users encounter this error every now and then. It is basically caused by;
- The write protection on your drive. If your drive is designated as “Read Only”, this error will naturally pop-up.
- Damaged drive. If the drive is damaged or corrupted, then it can cause the error to pop-up.
Here’s a few solutions to fix “Windows cannot run disk checking on this volume because it is write protected” issue.
Methods for Fixing the Error
Fix with CHKDSK in the Command Prompt
This is a very easy procedure and it has proved to be useful. Moreover, it is Microsoft Support that offers this approach, it’s certainly worth a try.
Step 1: Press Win + Q to search and launch the Elevated Command Prompt.
Step 2: After it has been opened up, you need to type in the following:
“chkdsk D: /f /r /x”
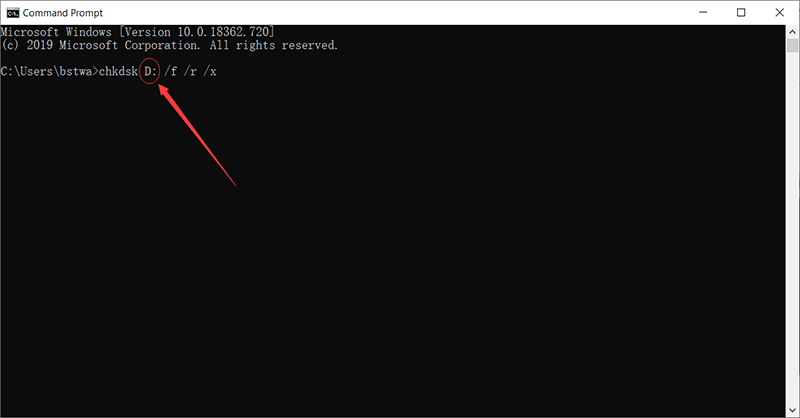
Step 3: Here, “D” represents the faulty or damaged drive. So, you need to change it according to your drive.
/f parameter looks for your drive for any errors and it tries to fix them.
/r parameter scans your drive for bad sectors and fixes them.
/x parameter dismounts your drive. So, if your drive is in use, it won’t be any longer until the search is finished.
Scan Your Drive for Corruption
You can try to scan your drive for the damaged file which is the main cause of the problem.
Step 1: Open “This PC”.
Step 2: Now, find the damaged partition and right-click on it.
Step 3: Choose “Properties” from the main menu.
Step 4: Then, click on “Tool” tab and click on “Check”.
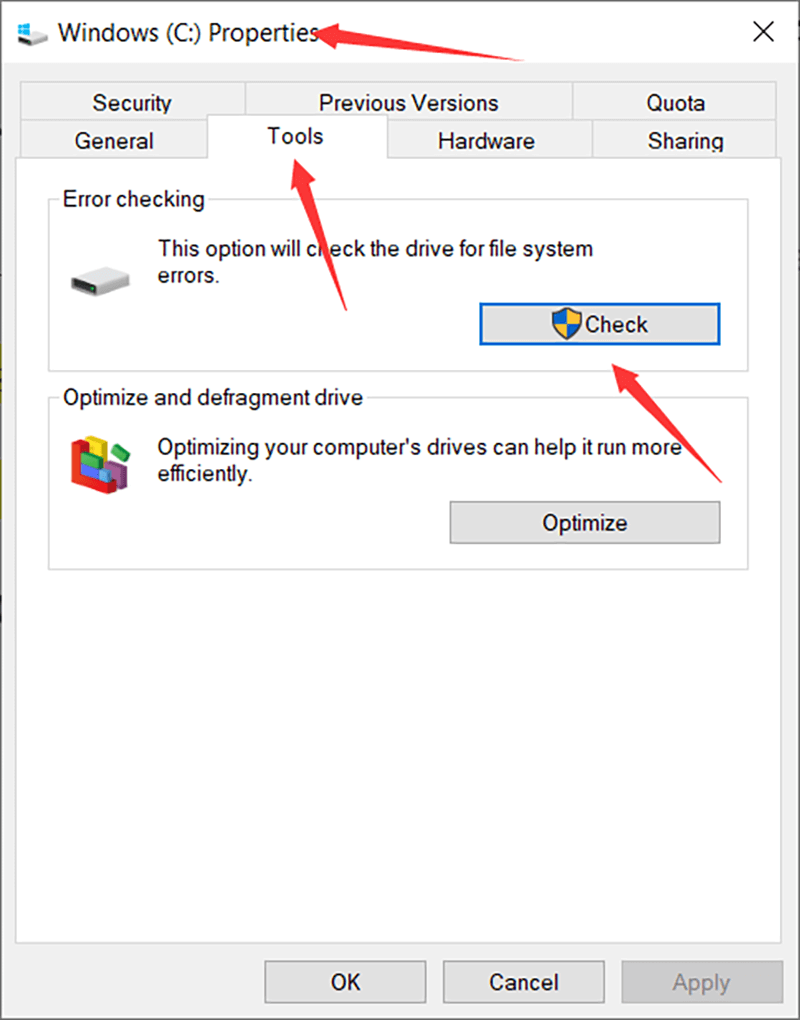
Step 5: If an UAC dialog pops up, click “Yes”. Then, wait for the scan to complete.
Use DiskPart
The DiskPart is also a utility command that you can use to make partitions on your drive. You can also use it to change the attributes of the drive which is what we are going to do here.
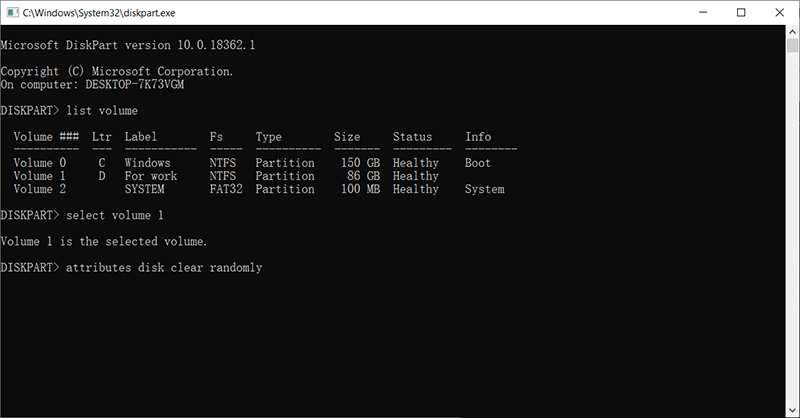
Step 1: Press Win + Q and type DiskPart to open it
Step 2: Run it. After the said utility opens up, you need to type the following
“List volume”
Step 3: After that, the window will list all the volumes of your hard drive. So, type
“select volume #”
Step 4: You will need to replace “#” with the drive alphabet.
Step 5: Finally, you need to type in the following words:
“attributes disk clear randomly”
After all these are done, you have to wait for the procedure to get finished.
Recover the Formatted Disk Data
You can simply fix the issue by formatting the drive in question. But it also means removal of all the files on that drive. As the partition is designated damaged or read only, you won’t even be able to copy or backup those files.
There are actually no natural way of doing it. Thus the urgent need for fixing the problem has resulted in a plethora of recovery tools.
There are a lot of programs with similar properties that are available on the Internet, which will make your quest for a good data recovery program a lot harder. But don’t worry we have taken the liberty and found out the best professional software for you.
The software is called Bitwar Data Recovery. It is a very effective and professional program with state-of-the-art technology that can even recover the formatted disk data.
Here’s how it operates:
Step 1: Download and install Bitwar Data Recovery according to your OS. Then launch it.
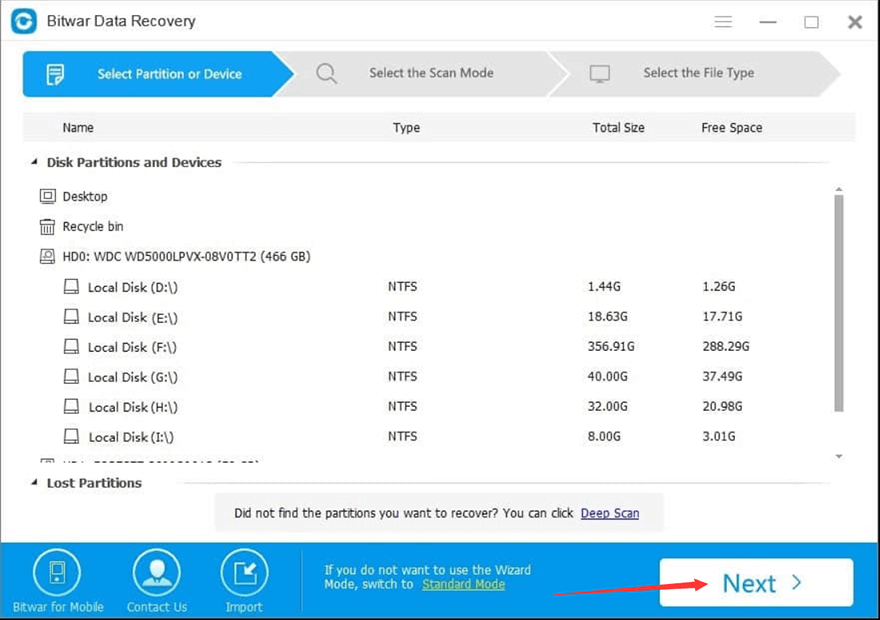
Step 2: Choose the partition that you have formatted and whose data you need to recover. Then, click “Next”.
Step 3: Now, select the “Formatted Recovery” mode from the program interface and click “Next”.
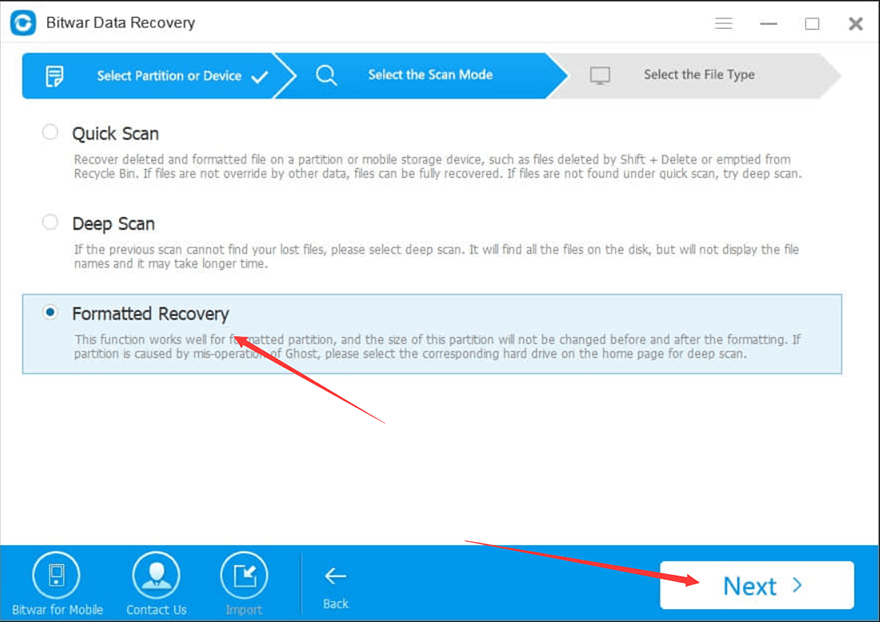
Step 4: If you are unable to find the files via formatted recovery, you need to use “Deep Scan”. Deep scan uses a detailed scanning algorithm that will definitely find the data.
Step 5: Then, you have to choose the file types.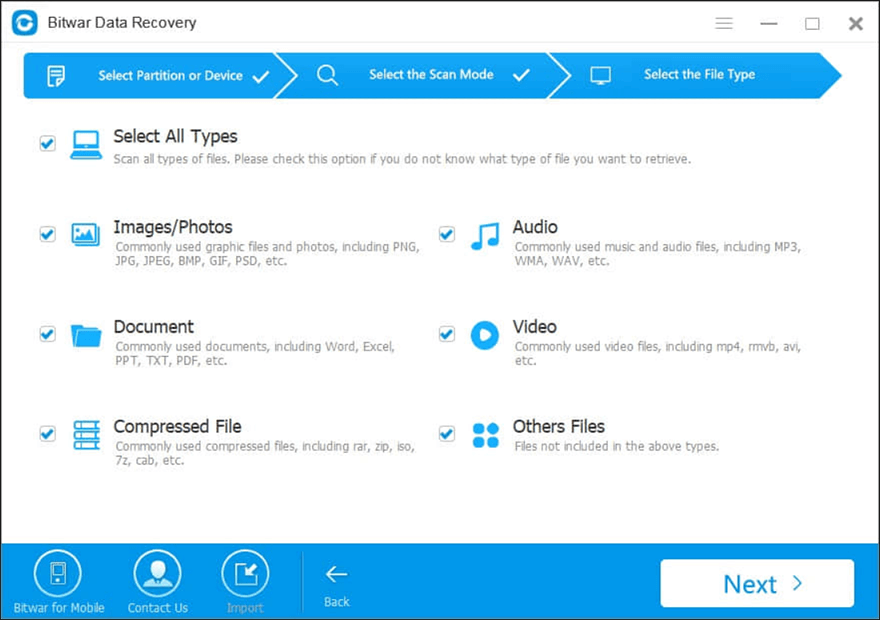
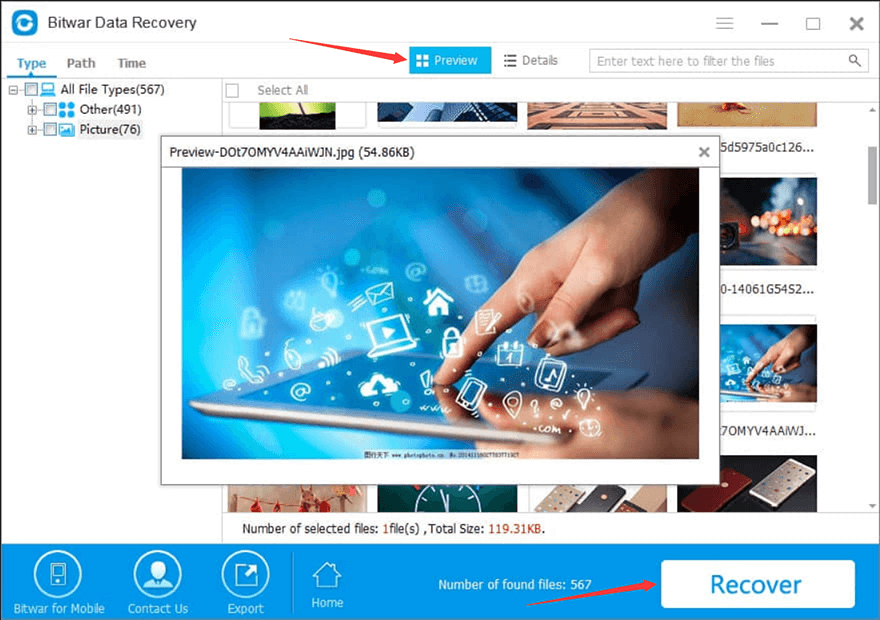
Step 6: After the scan is complete you will get a preview of the recoverable files. It is a very convenient function, so you will get all the details.
Step 7: Now, just click “Recover” to recover the formatted files.
Just remember, you must not restore the files to their original location, they will be overwritten. You can use this program to recover deleted files on many storage devices such as USB flash drives.
Conclusion
What we have known from this article is that the mentioned error is very common but we can solve it by formatting the faulty drive, which is an arguably terrible fix, as it removes all the files from the partition. So, if you have already done this, then you can use Bitwar Data Recovery to recover those erased files easily. But if you haven’t gone through it and the error is still persistent, then you can use any of the mentioned approaches to fixing Windows cannot run disk checking on this volume because it is write protected error.
Related Articles
- [FIXED] “Windows Was Unable To Repair the Drive” Error on Windows
- [SOLVED] The Directory is Invalid Error
- 4 Methods for fixing “Desktop Refers to A Location That Is Unavailable” Error
- 9 Effective Solutions to Fix “Toshiba External Hard Drive Not Working” Error
- How to fix the “Folder Access Denied Error on Windows 10”


