

Summary: Have you ever encountered the error message “One of your Disk Needs to be checked for Consistency. You may cancel the disk check, but it is strongly recommended that you continue.” during Windows booting? This article provides 6 capable solutions for you. Keep reading!
Error “One of your Disk Needs to be Checked for Consistency. You may cancel the disk check, but it is strongly recommended that you continue.” is something you should not be worried. You also need not worry about your hard drive. Let us give you a few reasons why this happen.
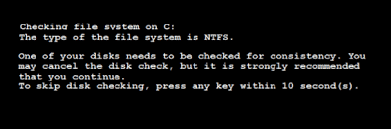
Table of Contents
Reasons for Windows are Checking Your Disk for Consistency
- Shut down the PC improperly
- PC crashes down suddenly
- PC freeze
- Battery removed
- Power outage
- Removing USB Flash drive while Windows has its current activity with the drive
What To Do
When this error pops up, allow it to run through it may take some time. If check disk cancels on startup, the error one of your disks needs to be checked for consistency every reboot pops up again leaving you no choice.
This is because the operating system still considers the drive for scanning and checking. In the case of USB flash drive, Windows needs to scan the drive completely to mark it as CLEAN again.
Why is my computer checking the disk at every startup? If every time Windows reboot, and it automatically scans your USB flash drive, here is what you can do to disable automatic disk check.
Disabling Automatic Disk Check of USB Flash Drive
Step 1. Go to Start Menu search box and type CMD.
Step 2. Click the Command Prompt and proceed to Run as Administrator
Step 3. In the command window, type chkntfs /x F: (Replace F: to the drive letter of USB Flash Drive)
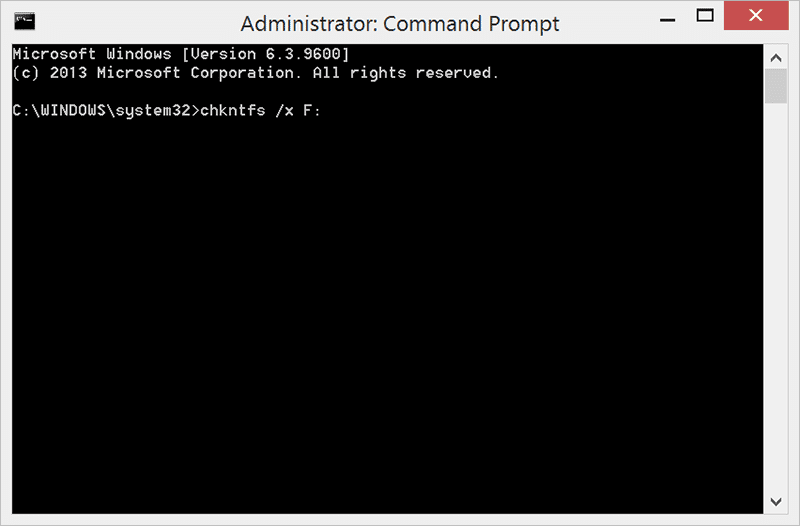
Step 4. Press Enter to disable automatic disk check finally.
Now we give you further solutions. and, here is the thing you must do. Back up your files! Why? Running chkdsk command might cause loss of data. This is due to check the disk for consistency every reboot excessively.
If in the worst case your files have been lost, download and install Bitwar Data Recovery – your partner recovery tool in ensuring your files are safely back. To recover your data, follow the steps provided below:
Recover Data With Bitwar Data Recovery
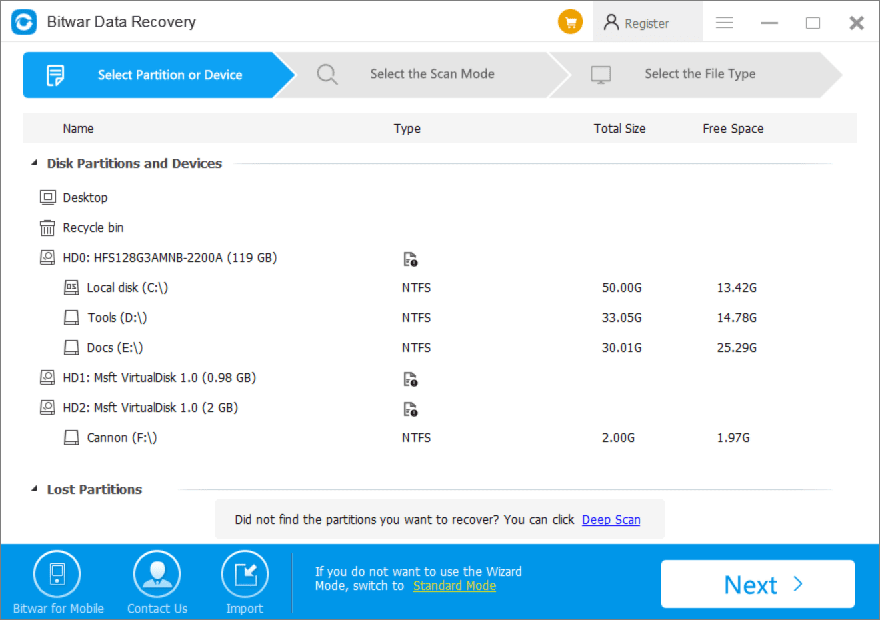
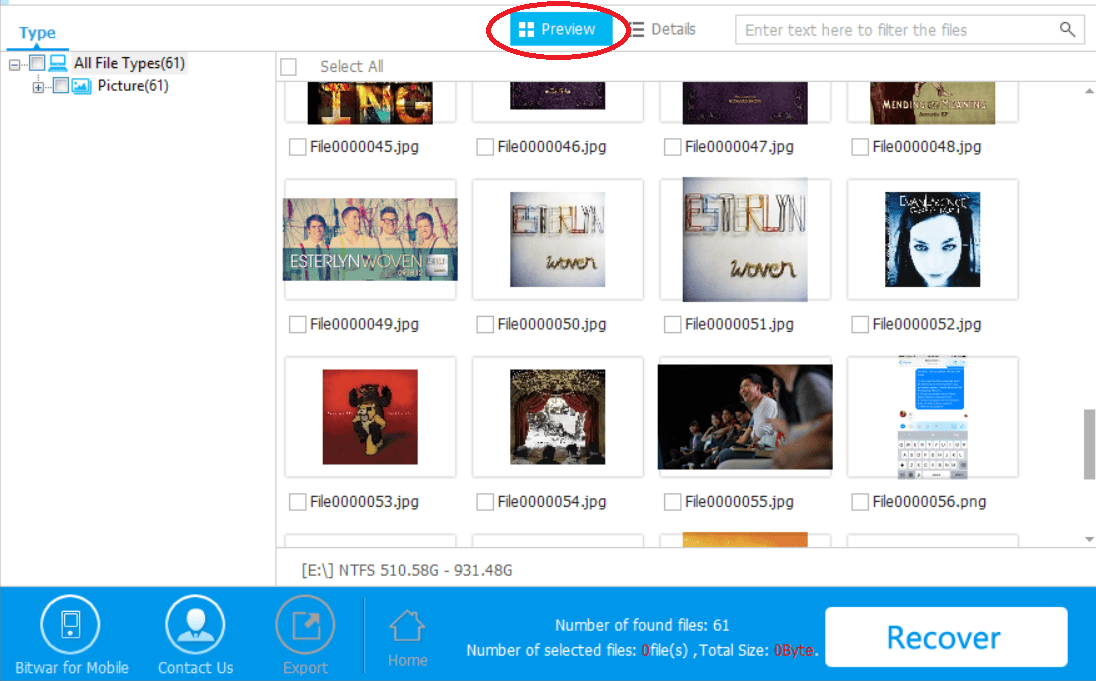
Step 1. Select the device or drive where you wish to recover your lost data.
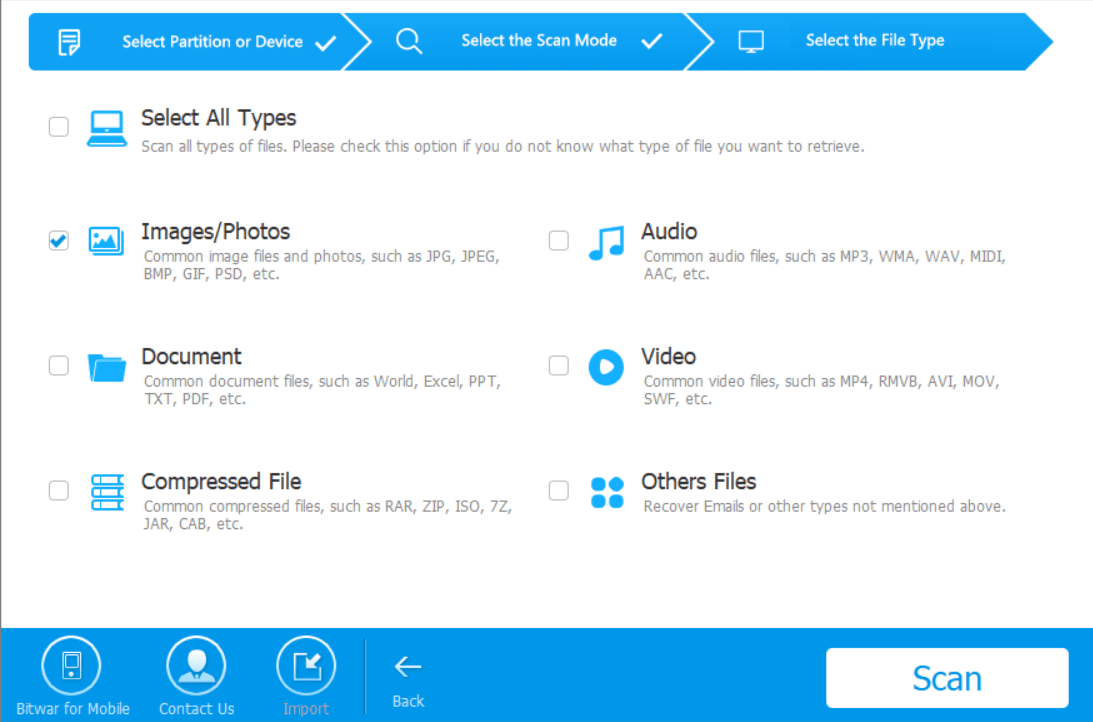
Step 2. Select a recovery mode and choose your target recovering file types (e.g., document, photo, video)
Step 3. Scan and preview the data, then hit the Recover button and save the data into different device or partition.
After recovering the files successfully, let’s proceed to the solutions in fixing “One of your Disk Needs to be Checked for Consistency. You may cancel the disk check, but it is strongly recommended that you continue.”
5 Methods to Fix one of Your Disk Needs to be Checked for Consistency
Method 1: Disable Automatic Disk Check with Registry Editor
Step 1. Type Regedit in the search box when opening the Start Menu.
Step 2. Right-click regedit.exe. Select Run as administrator
Step 3. Go to the left part of the Registry Editor and expand the following keys:
HKEY_LOCAL_MACHINES/SYSTEM/CurrentControlSet/Control/Session Manager
Step 4. Locate and double-click BootExecute. Find default value is autocheck autochk * – all drive is checked for consistency.
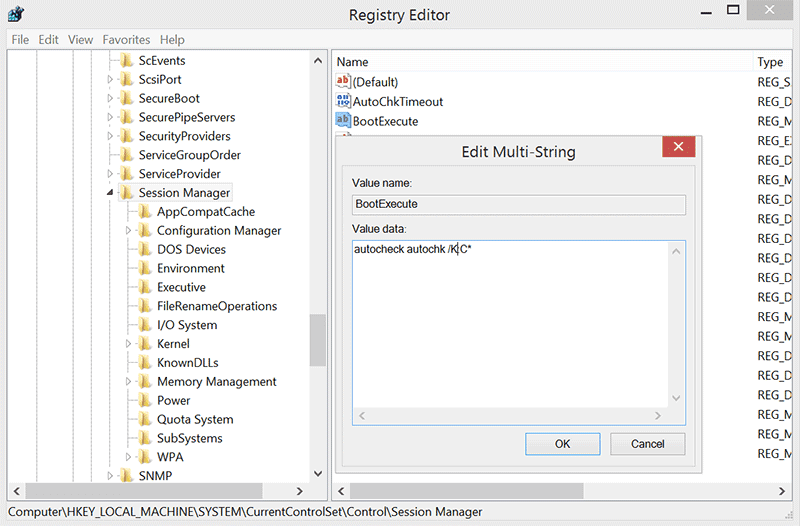
Step 5. Type “/K:C” in between autochck and *, replace C to your hard drive letter. This step is to disable autocheck at system startup.
Method 2: Run chkdsk Command
Step 1. Remove floppy disk, DVD, and CD from the PC and restart.
Step 2. Press F8 before Windows logo appears in the screen.
Step 3. When the Advance Boot Option appears, by using the arrow keys, highlight options.
Step 4. Choose to Repair your computer.
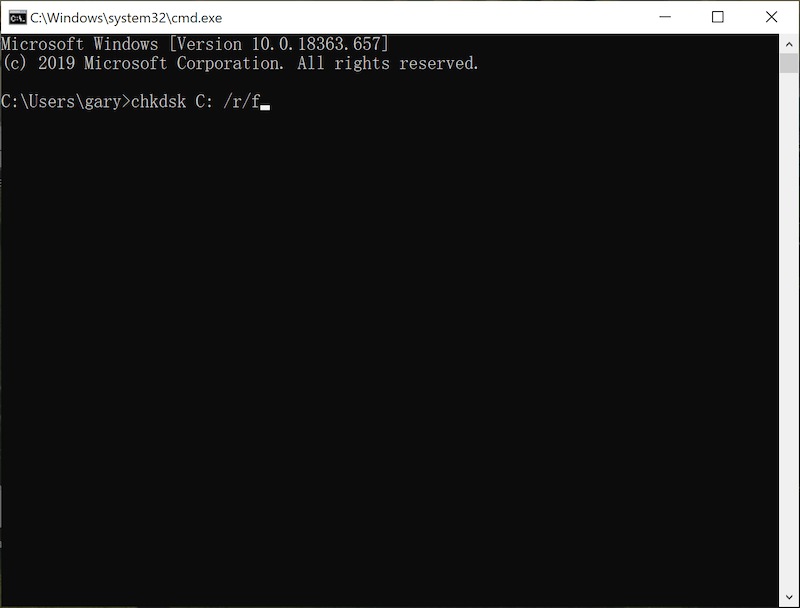
Step 5. Type chkdsk C: /r/f, Remember again that replace C: to your hard drive.
Method 3: Test Hard Drive with Diagnostic Tool
If in the case that disk check cannot fix the error, do the following steps.
Step 1. Utilize the utility of the driver’s manufacturer in the testing hard drive. In doing this, go to the official website of driver’s manufacturer and search for any diagnostic tool where you can perform scanning of your disk.
Step 2. Test hard drive using a third-party tool. You can search online for tools that have a free function in testing hard drive status and fix bad sectors.
Step 3. Run the program on your PC.
Step 4. Right-click the disk and select Verify or Repair Bad Sectors.
Method 4: Disk Defragment
Step 1. Go to This PC; find the hard drive where disk check was performed.
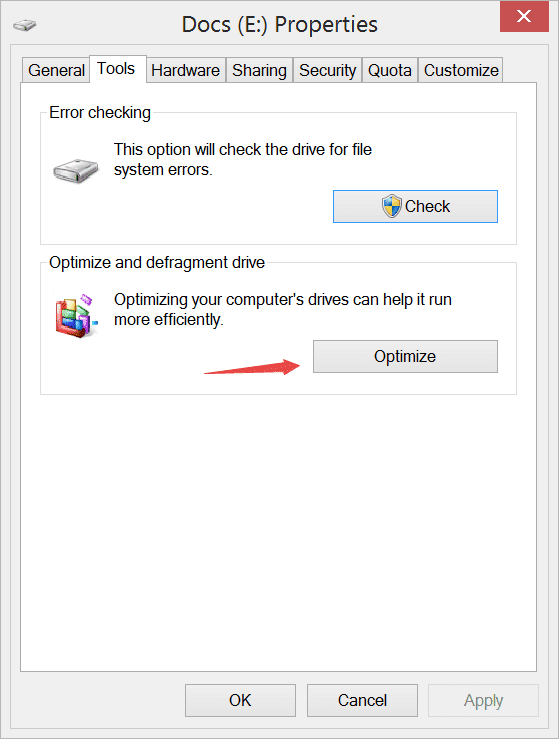
Step 2. Right-click hard drive and select Properties.
Step 3. Go to Tools tab and click Optimize which is under Defragmentation.
This method can also proceed by opening the Command Prompt and type chkdsk C:/f (replace C with the drive letter assigned to your hard drive) to complete.
Method 5: Format Disk
When nothing works in the above methods, you may now format your disk.
Step 1. Go to This PC, locate your hard drive.
Step 2. Right-click your hard drive and select Format. Then follow all the prompt messages.
Learn It Now!
Error “One of your Disks Needs to be Checked for Consistency. You may cancel the disk check, but it is strongly recommended that you continue.” is an indication that there is something wrong with the operating system.
Before doing any given methods above, make sure to recover your file (which is the most important thing) right ahead of time. By this, you do not have to worry, download Bitwar Data Recovery to recover lost files.
Take note that no expertise needed, it just takes few clicks away, and you have your files back. You must also understand that Windows sometimes prompts in the scanning disk automatically every single time of rebooting even if the checked disk has been completed.
Download for PC Download for Mac
Read More
- Where do Deleted Files Go? Here’s A Complete Guide for You
- 7 Solutions to fix Hard Drive Unallocated Error on Windows 10
- Fixed: Windows cannot Access the Specified Device Path or File Error
- [FIXED] Windows Cannot Run Disk Checking on This Volume Because It Is Write Protected
- [FIXED] “Windows Was Unable To Repair the Drive” Error on Windows


