

Summary: In this article, we will walk you through various effective ways to stop “Windows 10 from Deleting Files without Asking” and recover all your deleted data using the powerful data recovery tool – Bitwar Data Recovery Software.
Have you ever come across a problem about deletion after upgrading to Windows 10? Is your Windows 10 deleting files by itself? Are you looking for a solution to stop Windows 10 from deleting files automatically and restore all your relevant data? Many Windows 10 users have reported the issue that Windows 10 deletes their files without asking.
Do not worry if you face such as issue as this article will provide you with the best possible methods to stop “Windows 10 from Deleting Files without Asking” and get back your precious data using Bitwar Data Recovery software.
Table of Contents
Recover Lost Data from Windows 10
At the onset, it is best to retrieve all your vital data using Bitwar Data Recovery so that any risk of data loss can be prevented. It is highly reliable, efficient, and fast. Besides, it is based on a user-friendly interface so that anyone can easily use it.
Follow the steps below to recover data with Bitwar Data Recovery tool when Windows 10 Deleting Files without Asking:
Step 1. Download Bitwar Data Recovery and install it on your Windows 10.
Step 2. Choose Deleted File Recovery and click Next.
Step 3. Now, select the External Hard Drive by clicking on it and press on the Next button to continue.
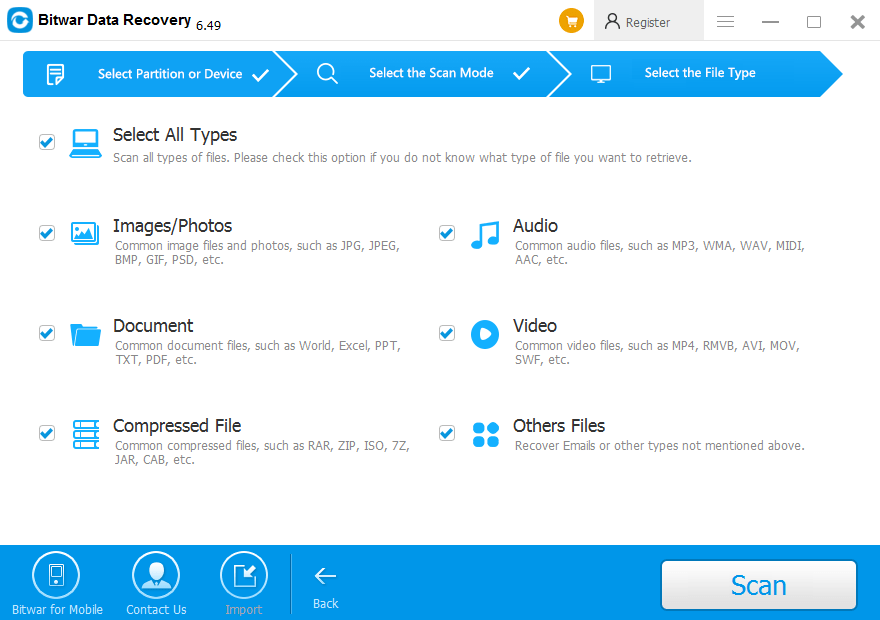
Step 4. Then, select the File Type to recover and click on Next.
Step 5. Lastly, Preview the files or data and click on Recover to start recovery.
TAKE NOTE: After you have successfully restored your data, SAVE it somewhere different from the SAME LOCATION, and follow the below solutions to Stop Windows 10 from Deleting Files without Asking.
Practical Solutions to Stop Windows 10 from Deleting Files without Asking
Solution 1: Turn-off Storage Sense on Windows 10
It is a new feature added by Windows to help users to delete unused files automatically when the disk space is low to save space in the computer. Moreover, it will also help the user to delete any files which are 30 or 60 days older from the Recycle Bin.
Sometimes it will delete older files from the Downloads folder so if you can change the default settings of the Storage Sense to prevent “Windows 10 from Deleting Files without Asking” to happen.
Step 1. Open the Windows Settings and find Storage.
Step 2. Now, turn off the Storage Sense feature by switching Off the button under Storage Sense.
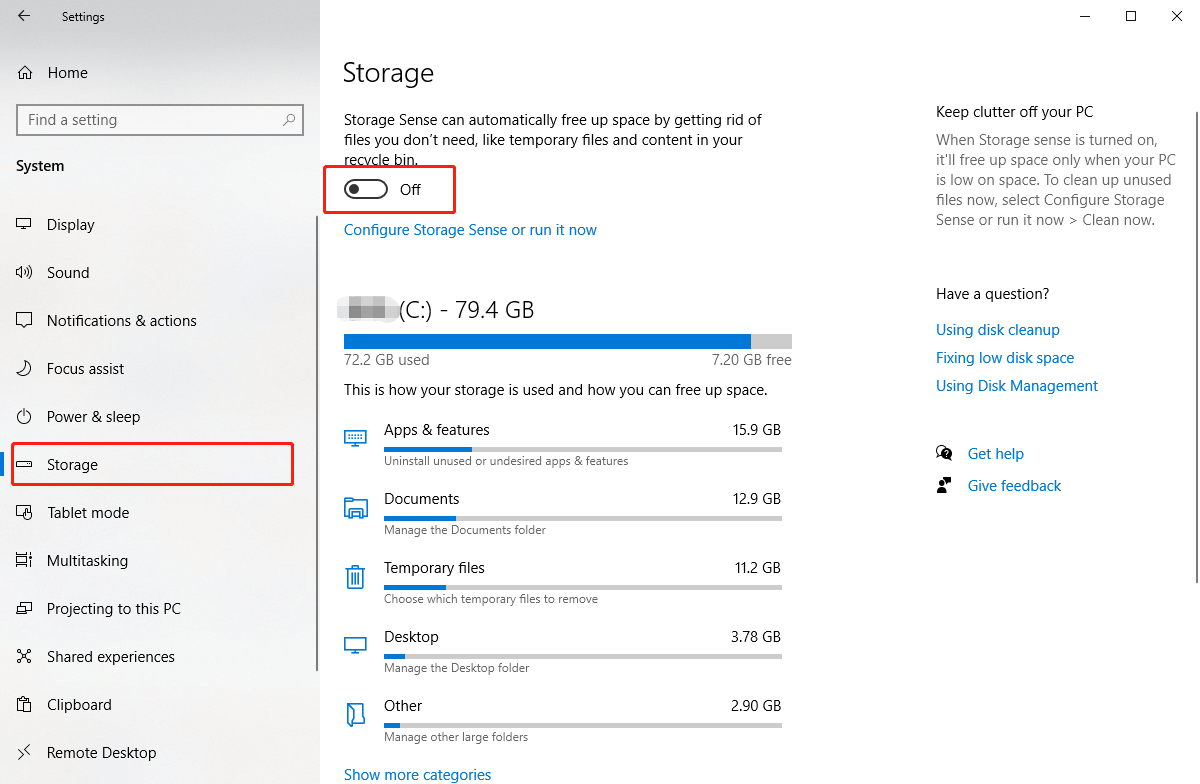
Once this feature is turned off, it will no longer be able to delete your files without asking to free-up space on Windows.
Solution 2: Recycle Bin Properties
Windows users can personally get a confirmation from Windows 10 when a file or folder is deleted from your system by setting the Recycle Bin properties in the system with the steps below:
Step 1. Right-click on Recycle Bin on desktop and choose Properties.
Step 2. Tick the box Display delete confirmation dialogue and click Apply.
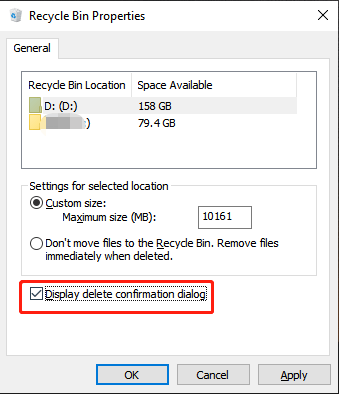
Step 3. Right now, you will always receive Confirmation from the operating system when you are deleting data.
Solution 3: Disable Windows Defender
Step 1. Open Virus & Threat Protection by typing Windows Defender in the search field of your system.
Step 2. From there, scroll down to Virus & Threat Protection Settings and choose Exclusions.
Step 3. Now, click on the Add or Remove Exclusions.
Step 4. After this, Add or Exclude files by clicking on the + icon and select Folder, File, Process, or File type. Then, Specify the folders/files which you don’t want to get removed/deleted by Windows Defender.
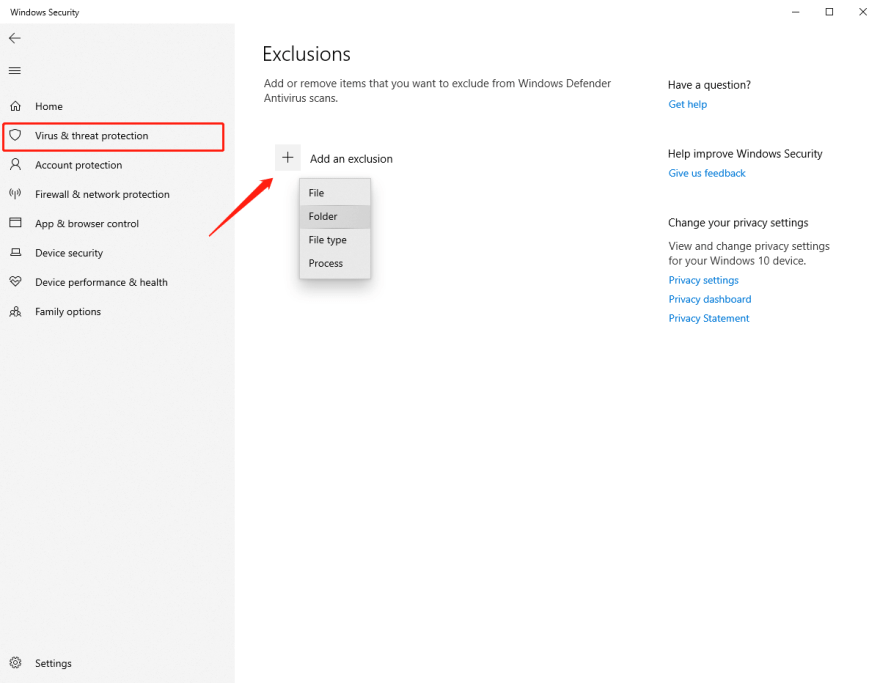
Step 5. Save the changes made.
Piece of Advice: If you don’t want .dll files to be deleted by Windows Defender, click on File Type and type the .dll extension and then click on Add. Doing this will not let the selected file to be Removed or Deleted.
Solution 4: Uninstall Faulty Updates
“Windows operating system starts deleting files without asking” happens when the faulty or incompatible Windows 10 is installed on your system. The most effective method to overcome this problem is by uninstalling the faulty update.
Step 1. Open Control Panel by pressing Windows + R keys at the same time and type Control Panel.
Step 2. Now, select Programs and Features and View Installed Updates.
Step 3. Next, click on the Installed On column header and sort it by dates.
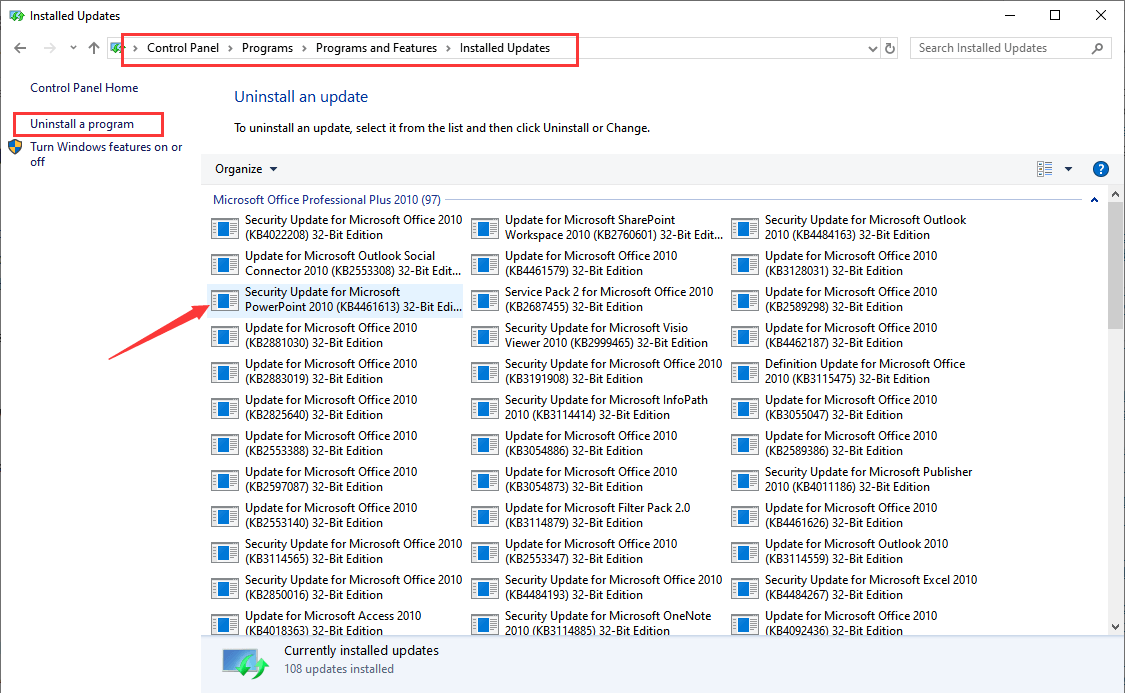
Step 4. After this, look for the large size and significant updates that you have downloaded recently and click on it to Uninstall.
Step 5. Reboot your system when the uninstallation process is finished.
If you want to install the latest version of Windows 10, refer to the Microsoft Windows 10 update official website and download it on your system. Besides, you can apply any of the solutions given above and check which one works for you.
Stop It Now!
When the “Stop Windows 10 from Deleting Files without Asking” issue occurs, and your Windows 10 keeps deleting files, just follow the best possible solutions above to overcome this problem and prevent permanent data loss.
If data loss occurs on your Windows, we suggest retrieving all your data with the help of the powerful data recovery software such as Bitwar Data Recovery that offers 100% data recovery from any storage device in just a few minutes.
Related Articles
- 5 Best Solutions To Fix “Folder Shows Empty But Files Are There” Issue on Windows
- How to fix the “Folder Access Denied Error on Windows 10.”
- Fast Fixes on “Windows 10 Show Hidden Files Not Working”
- 5 Solutions to Fix “Windows 10 Explorer Keeps Crashing Error”
- 7 Solutions to fix Hard Drive Unallocated Error on Windows 10


