

Summary: This article will take you through a couple of useful methods to recover deleted files due to “Windows Scan and Fix“, along with an additional solution that will work flawlessly to perform the Scan and Fix with BItwar Data Recovery Software.
Windows is an incredible operating system that comes with a lot of functionalities, such as a friendly user interface, which includes an ability to fix specific types of files or disk errors automatically. At the same time, some users may come across a message that says, “Scan and Fix.”
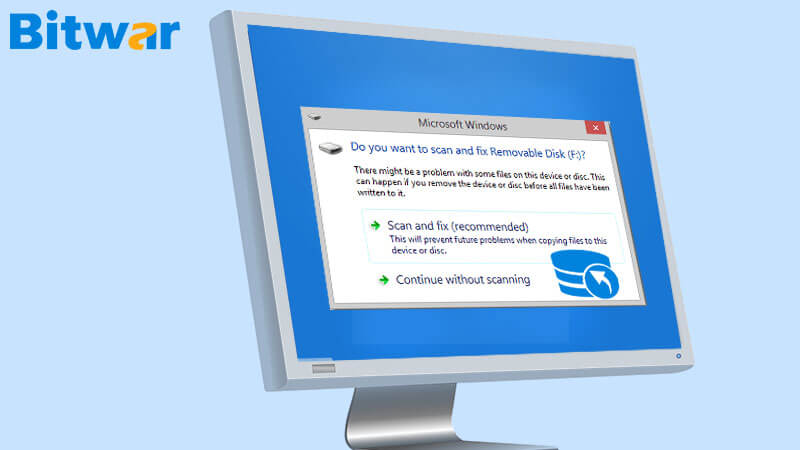
This message from the windows prompt shows up when there is some problem with the external storage device such as the hard disk. After reading the message, most of the Windows users will select the “Scan and Fix” option as recommended by the Windows to get rid of the errors and issues with the storage device that you are using.
However, this option may lead to data loss in the external storage device. In fact there is no need to worry if this happens, as this article provides a variety of guided steps to retrieve deleted files from Windows Scan and Fix.
Table of Contents
Reasons for Data Loss
Considering the issue above, we list some of the factors which may cause Windows to delete the files after Scan and Fix on the PC:
- Corrupted or Faulty hard drive.
- Presence of Bad Sectors.
- Viruses and Malware.
- Unsafe removal of the storage device.
- Power Outages.
Some of the factors mentioned above would not allow the storage device to work correctly and restrict user access to the data stored in it.
Overcome Windows Scan and Fix Delete File Issue
The best and easy solution to overcome this issue is to cancel the process of Windows Scan and Fix. After canceling the process, you may take steps to recover the lost data from the disk and then apply one of the solutions to fix the problem with the drive.
Follow the cases given below when the message “Scan and Fix” pop out:
Case 1: When you see the message to Scan and Fix the problem, choose the second option, which says, “Continue without scanning” to prevent data loss.
Case 2: In case the message displays to repair the disk, Cancel it.
After canceling the scan, go back and check is there any data is gone or not. Suppose that you have lost some important files, try to restore it by using the help of the professional data recovery tool such as Bitwar Data Recovery Software.
Deleted File Recovery Tool
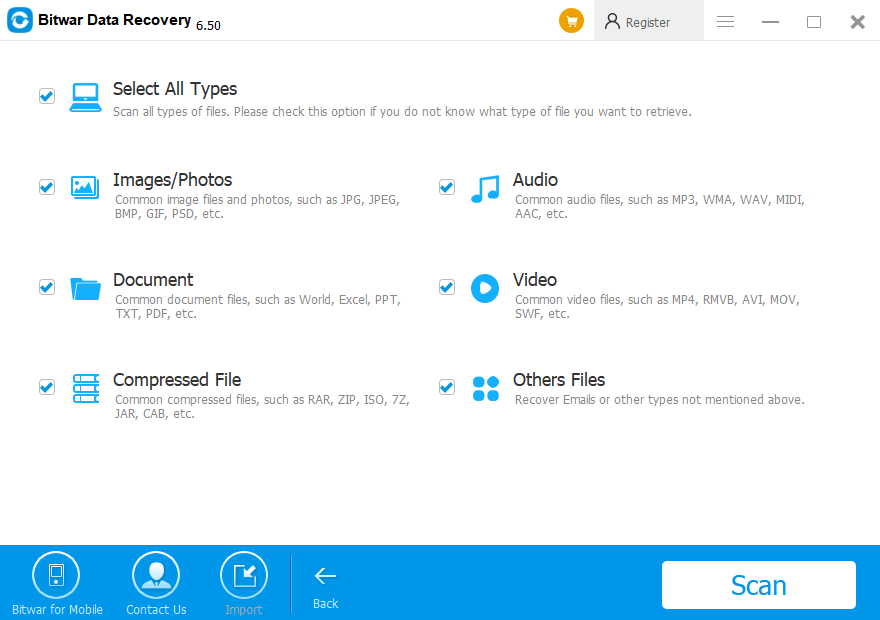
Bitwar Data Recovery Software can get back any type of data such as audio, video, and images from any storage devices like hard drive, USB flash drive, and SD card. This recovery tool is designed base on the user’s feedback and suggestion to provide an ultimate recovery experience.
Additionally, it comes with a user-friendly interface that helps to retrieve deleted files or data in just a couple of easy steps and supports both Windows and Mac operating systems.
Follow the Steps Below to Retrieve Deleted Files from Windows Scan and Fix:
Step 1. Download the Latest Recovery Software according to the operating system.
Step 2. Connect the external device to the computer.
Step 3. Launch the recovery software and select the option USB/Memory Card Recovery.
Step 4. Select the device and click on Next.
Step 5. Choose the File types and click on the Next button.
Step 6. Preview all the selected data and click on Recover to begin the recovery process.
IMPORTANT TIPS: When the data is recovered completely, SAVE at a NEW LOCATION instead the old file location to prevent data overwritten.
If luckily you do not have lost any data, then maintain its backup somewhere safe.
Useful Methods Worth a Try!
Useful Safe Scan Error Check for External Device
Perform a scan on an external device with the help of Windows Disk Management and Command Prompt.
Method 1: Activate Check from Disk Management
Step 1. Press Win + X and choose Disk Management. Then, and Search for the erroneous external drive.
Step 2. Right-click on the disk that requires repairing and select the Properties option from the context menu.
Step 3. Navigate to the Tools tab and select the Check button located under Error Checking.
Step 4. Choose the Scan and Repair Drive option that occurs in Error Checking Window.
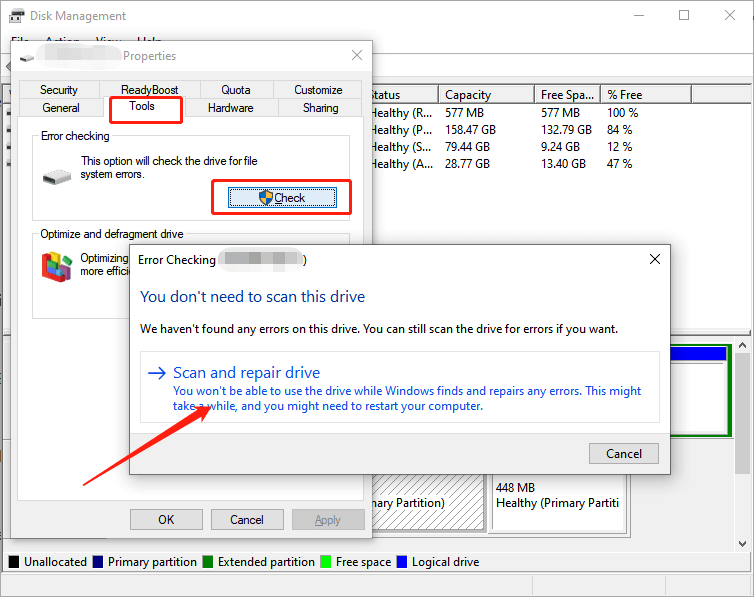
Step 5. Wait for the repair process to complete, which is just be awhile.
Step 6. Finally, click on Close.
Method 2: Run chkdsk Command Prompt
Step 1. Go to the Seach menu by pressing Win + S and type cmd in the search box to open the Command Prompt.
Step 2. Launch command prompt and input chkdsk *: /f command and press Enter to execute it. ( * refers to the drive letter)
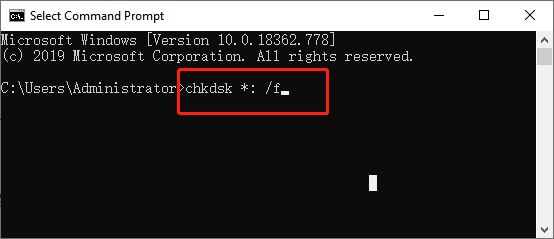
Step 3. Please wait awhile for the command prompt to finish this task.
Step 4. Exit out of the command prompt windows by selecting X from the upper right corner or type Exit and press Enter.
Besides, users can opt to format the erroneous drive after recovering and backing up the vital data to remove the viruses, malware, and bad sectors.
Recover Back Now!
Windows is a highly user-friendly operating system that works wonderfully to resolve the different types of issues encountered by the system. Nevertheless, the internal repair system may cause loss of data. Windows Scan and Fix option that search and repair issues in the external devices like SD card or the hard drive, can lead to accidental data deletion after fixing the problem.
Just in case data loss along the way, always remember to use data recovery software for Windows like Bitwar Data Recovery software to recover deleted files on the external device from Windows Scan and Fix!


